Arduino is an open source electronics platform based on easy-to-use hardware and software. It works for anyone working on an interactive project. The Arduino development environment makes it easy to write code and upload it to an I/O board. You can use the Arduino language (C\C++) to interact with Arduino hardware. We provide a complete Arduino environment.
MegaPi is compatible with the Arduino Mega 2560, so you can develop programs using the Arduino IDE. If you are using an Arduino IED, we recommend that you install the Makeblock library.
Arduino programming
Set the Arduino
- Get the Arduino IDE and Makeblock library
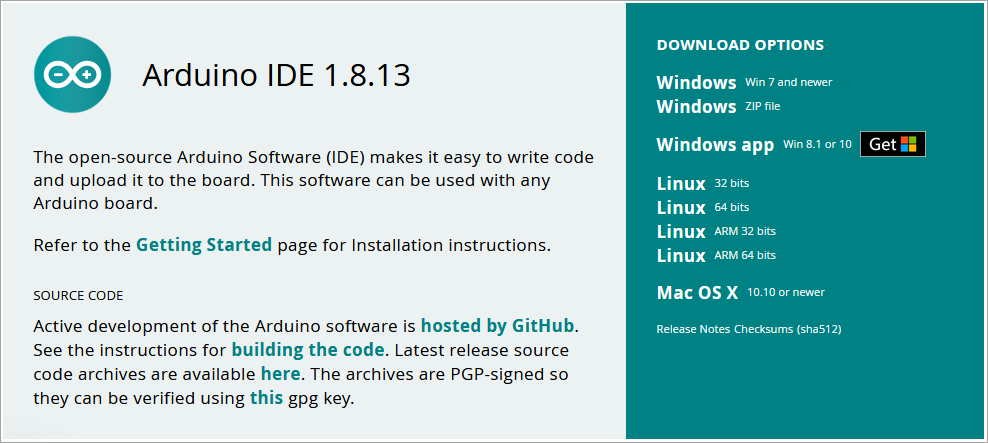
Download the Arduino IDE from the Arduino official website:
https://www.arduino.cc/en/Main/Software
Download the installation package for the corresponding operating system (subject to the latest version).
- Download the Makeblock library function: Library file
Unzip the Makeblock folder in the ZIP to the Arduino default library. Your Arduino library folder should now look like this:
Windows 7 (on Windows) :
[ Arduino installation directory ]\libraries\makeblock\ SRC
[ Arduino installation directory ]\libraries\makeblock\example

Or something like this (on a Mac) :
\ [arduino directory] Contents \ Java \ libraries \ makeblock \ SRC
[Arduino directory] Contents \ Java \ Libraries \ Makeblock \ Example
- Open the Arduino application. If it is already open, you need to reboot to see the changes
Connect MegaPi to your computer
Materials: computer, MEGAPI, USB B-type interface cable, 9-12V power supply, etc.
- Connect MegaPi with USB cable and the computer will automatically install MegaPi driver;
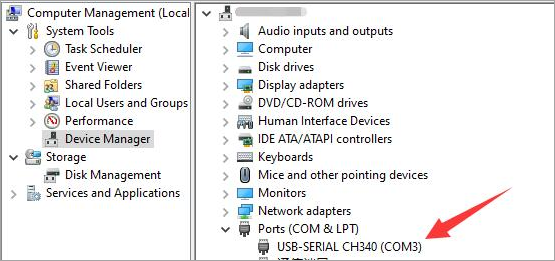
- Open Device Manager and you will see the port number of MegaPi. Different computers may have different port numbers. The port number in the figure is COM3.
- Then we can verify this with Blink.
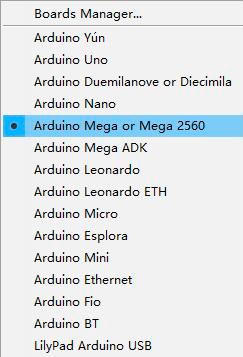
a. Open the Arduino IDE and click Tools > Board, choose Arduino Mega 2560 or Mega ADK (different versions of the Arduino IDE will vary slightly. You need to choose the Mega 2560 option.
b. Choose Tools > Port, and select COM3 (in addition to COM1, the corresponding COM Port must be selected).
c. Choose File > Examples > 01.Basics > Blink to open Blink. Cick the Upload uploader. This will last about 1 minute.
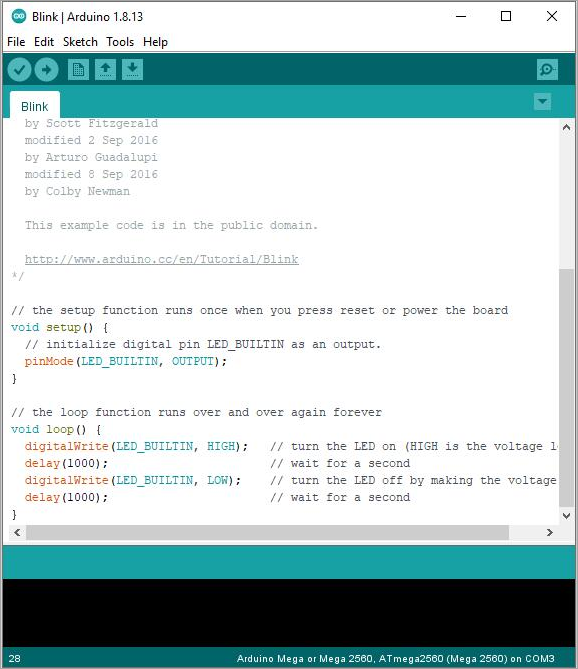
d. After that, you will see the blue LED lights on Megapi blinking at one-second intervals.
- If the driver is not automatically installed on your computer, how to get and install the driver?
You can install the driver yourself:
Windows: CH341SER for Windows
Mac OSX: CH341SER for MAC
How to update and restore firmware
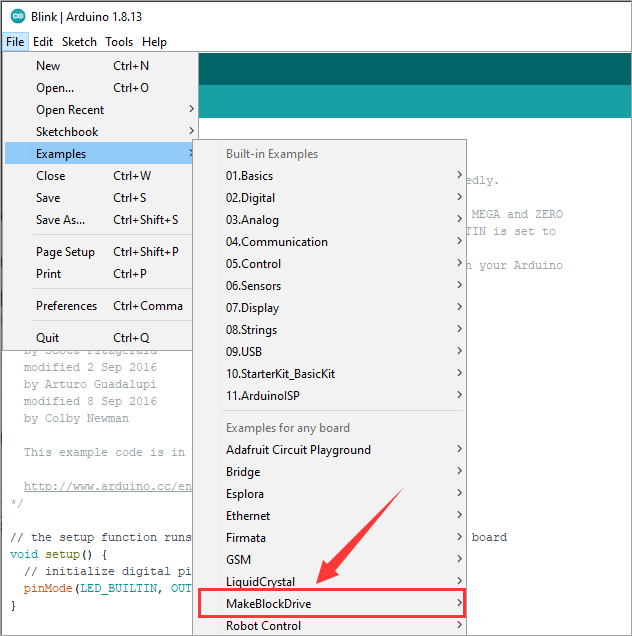
Choose File > Examples > MakeBlockDrive > Firmware_for_MegaPi > Firmware_for_MegaPi, and upload the program to MegaPi.
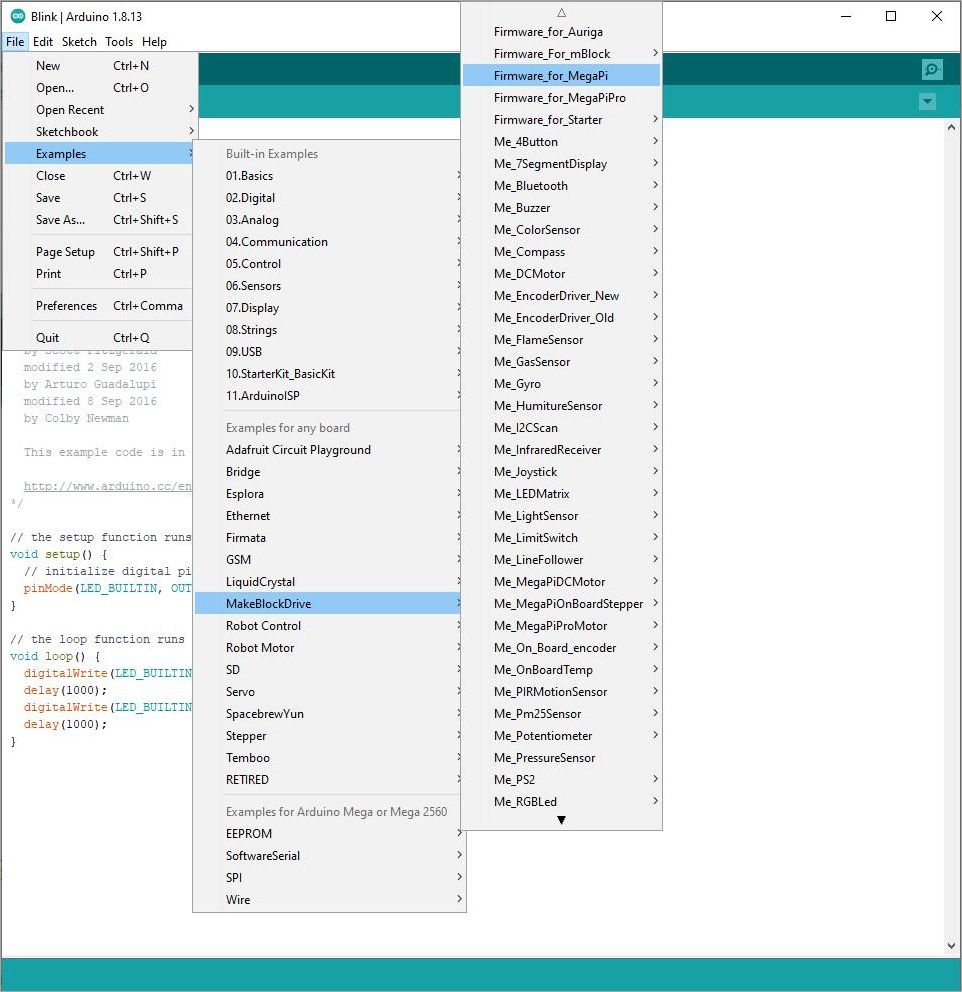
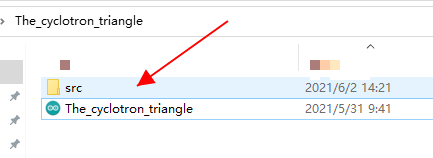
Note: When you create a new project file on Arduino you need to pull the link Mega header file——src file into your new project folder, such as this.
Programming examples
You can learn to program mBot Mega in Arduino by using the programming examples.
Download a programming example and open it to see how the program is compiled.
| No. | Form | Programming example |
| 1 | The crab walk | The crab walk——Arduino |
| 2 | Go square | Go square——Arduino |
| 3 | Avoid obstacles | Avoid obstacles——Arduino |
| 4 | Turn around | Turn around——Arduino |
| 5 | Gestures to switch | Gestures to switch——Arduino |
| 6 | Irascible Mega | Irascible Mega——Arduino |
| 7 | The gesture toning | The gesture toning——Arduino |
| 8 | Brightness control | Brightness control——Arduino |
| 9 | Touch the light | Touch the light——Arduino |
| 10 | Collision lamps | Collision lamps——Arduino |
| 11 | Firmware update | Firmware update——Arduino |
Comments
Please sign in to leave a comment.