This page describes how to write an obstacle avoidance program for mBot Neo with the mBlock app on your smart device.
1. Download and install the mBlock app
2. Connect mBot Neo to the mBlock app
4. Upload the program to mBot Neo
Before you start, make sure that you've got:
|
A tablet or smartphone |
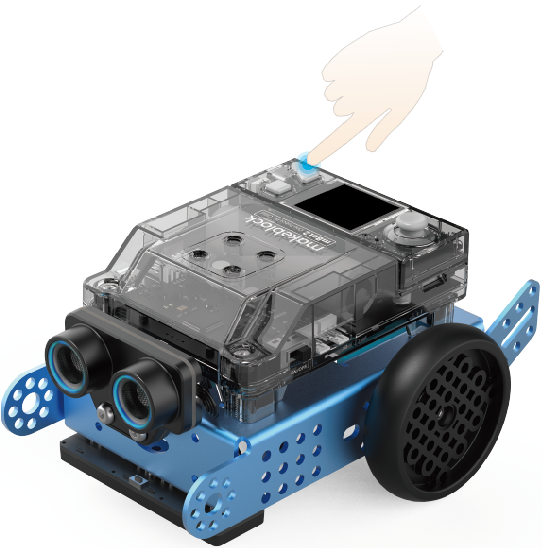
mBot Neo |
 or
or 
1. Download and install the mBlock app
2. Connect mBot Neo to the mBlock app
(1) Enable Bluetooth on your smart device.
(2) Power on mBot Neo.

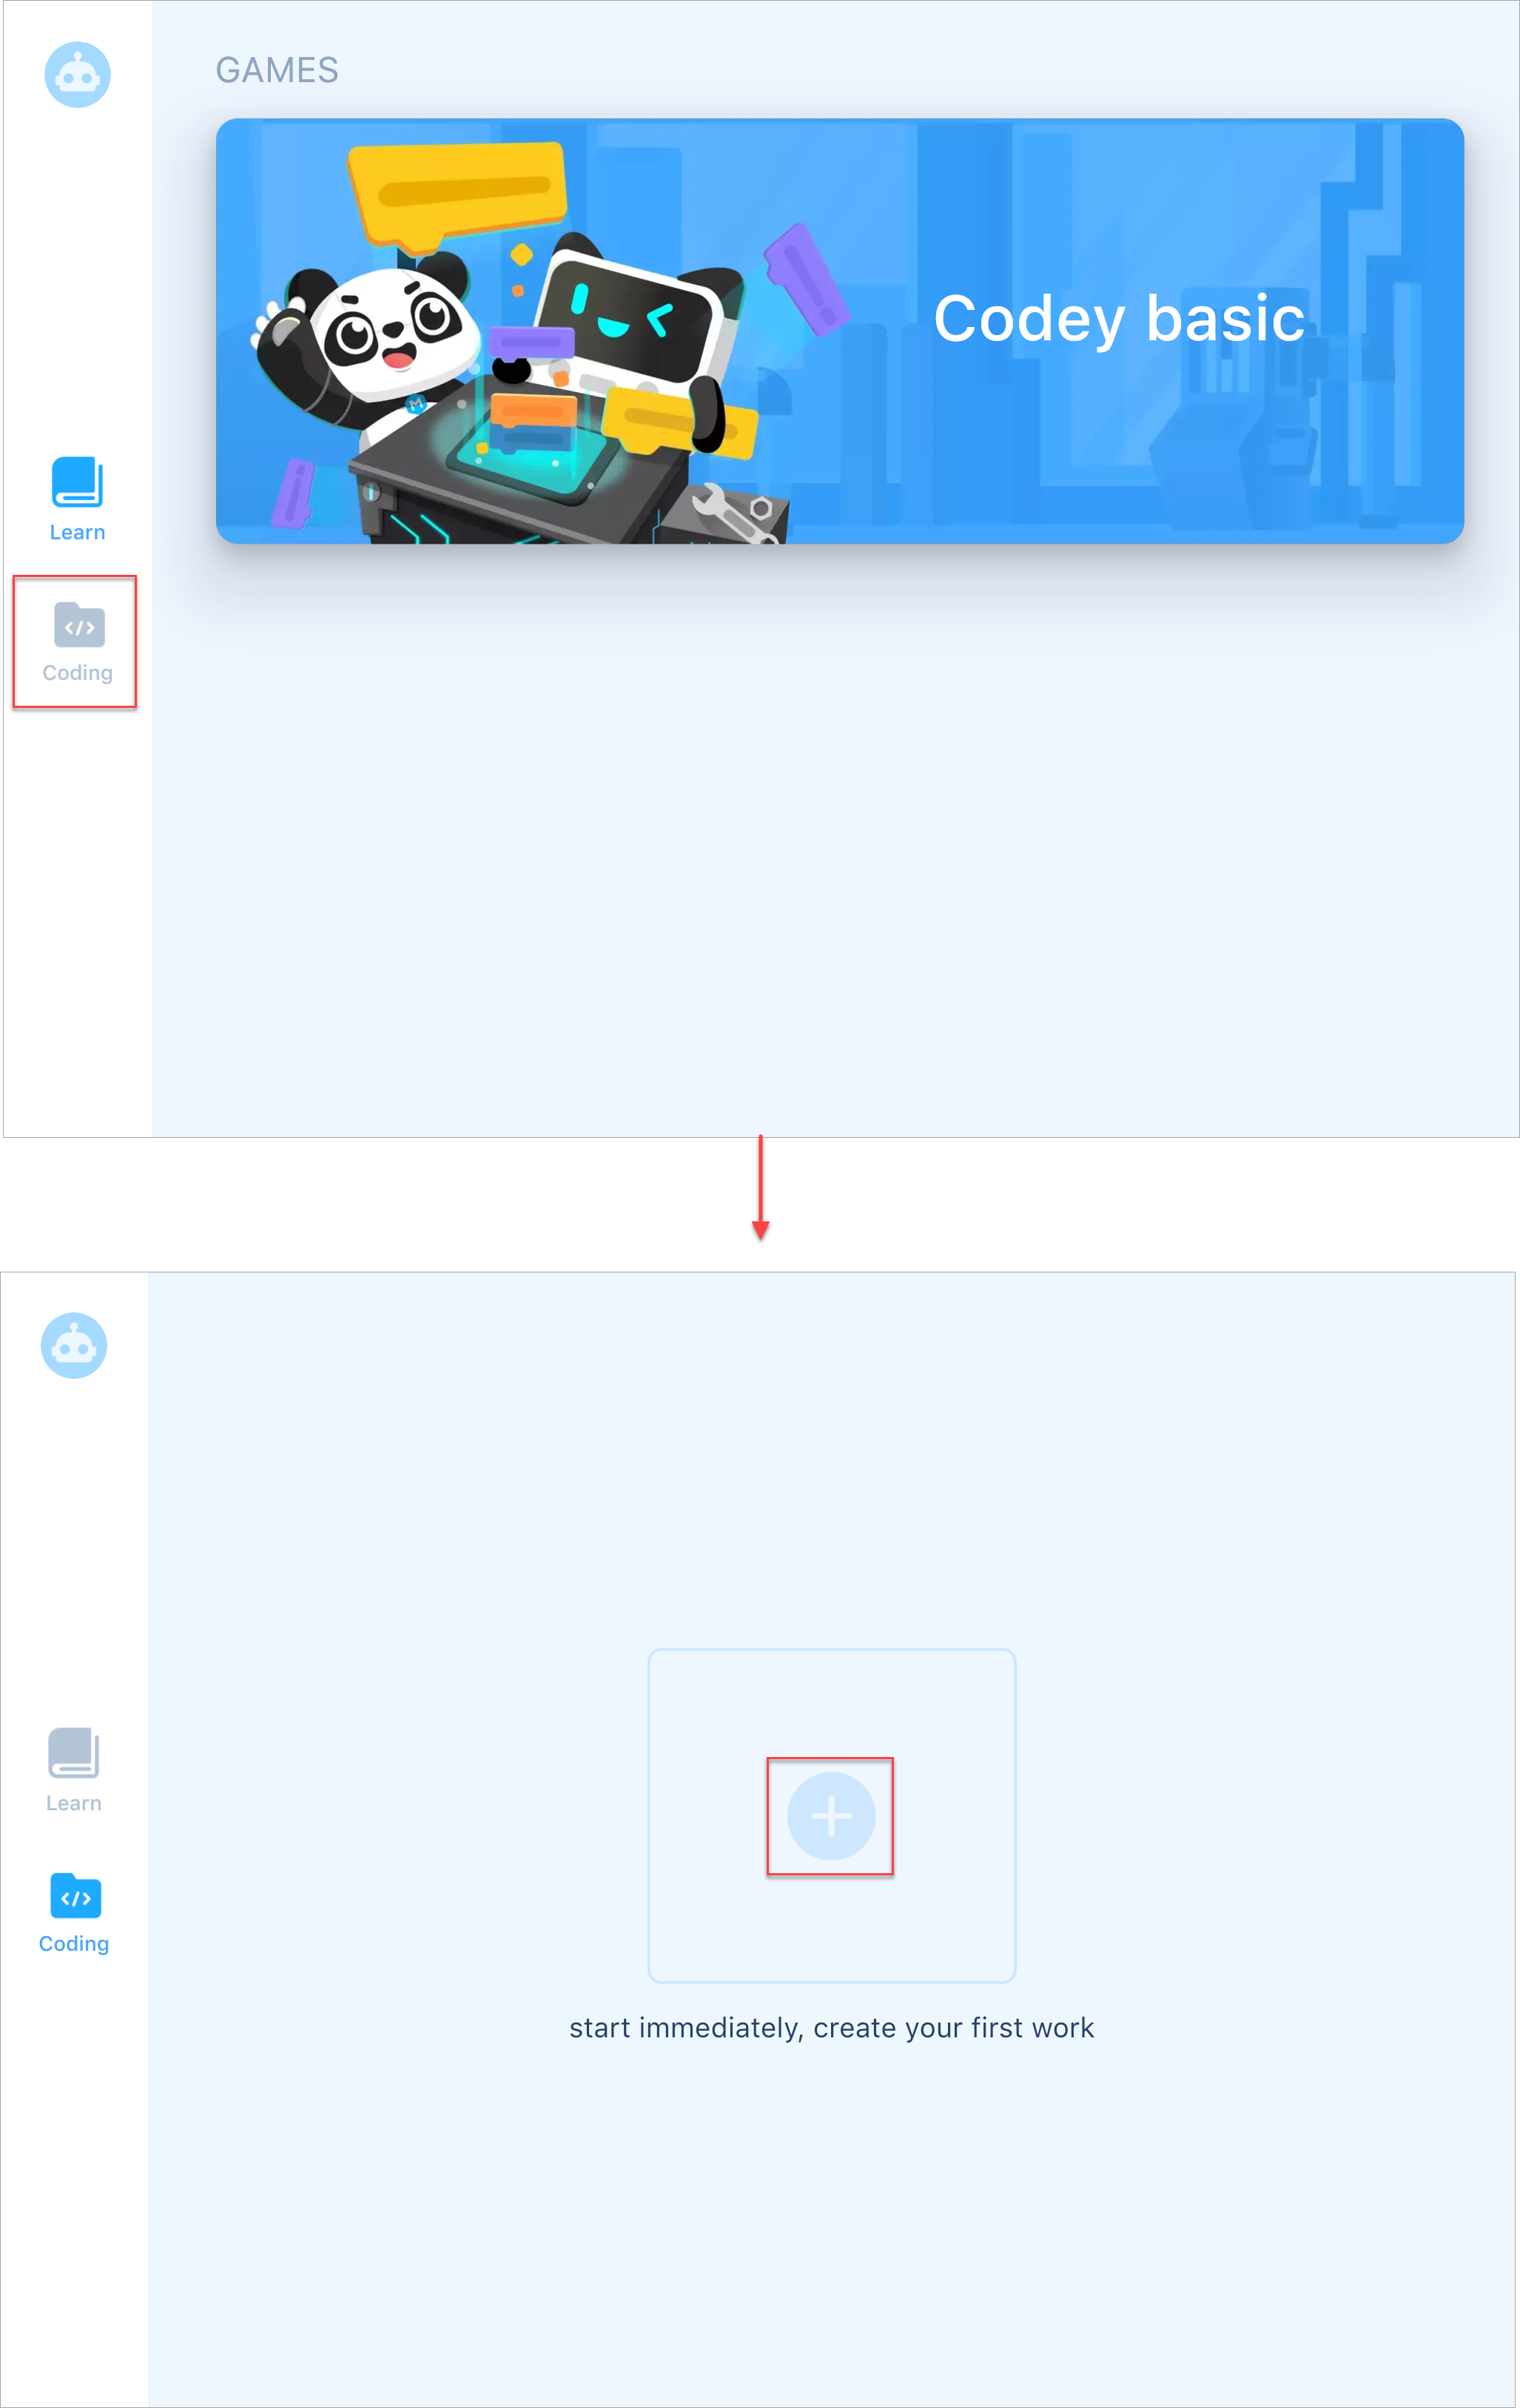
(3) Tap to open the mBlock app.

(4) Tap Coding, and tap + on the page that appears.
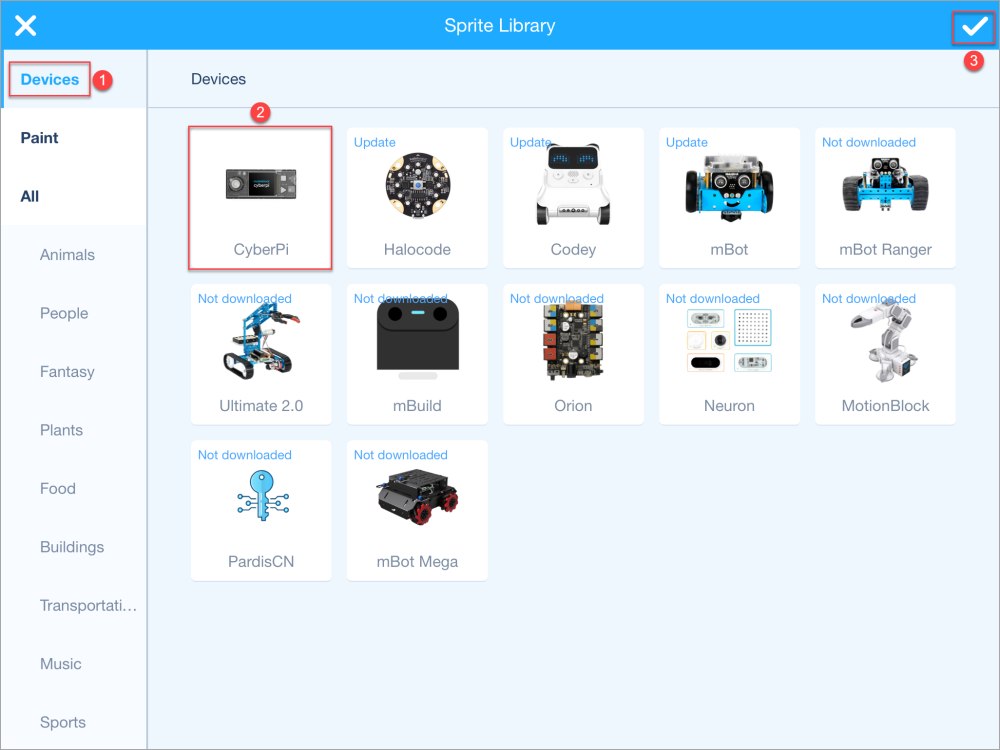
(5) In the Sprite Library, choose Devices > CyberPi and tap √.
(6) Tap the CyberPi setting icon and then tap Connect on the Device setting page that appears.
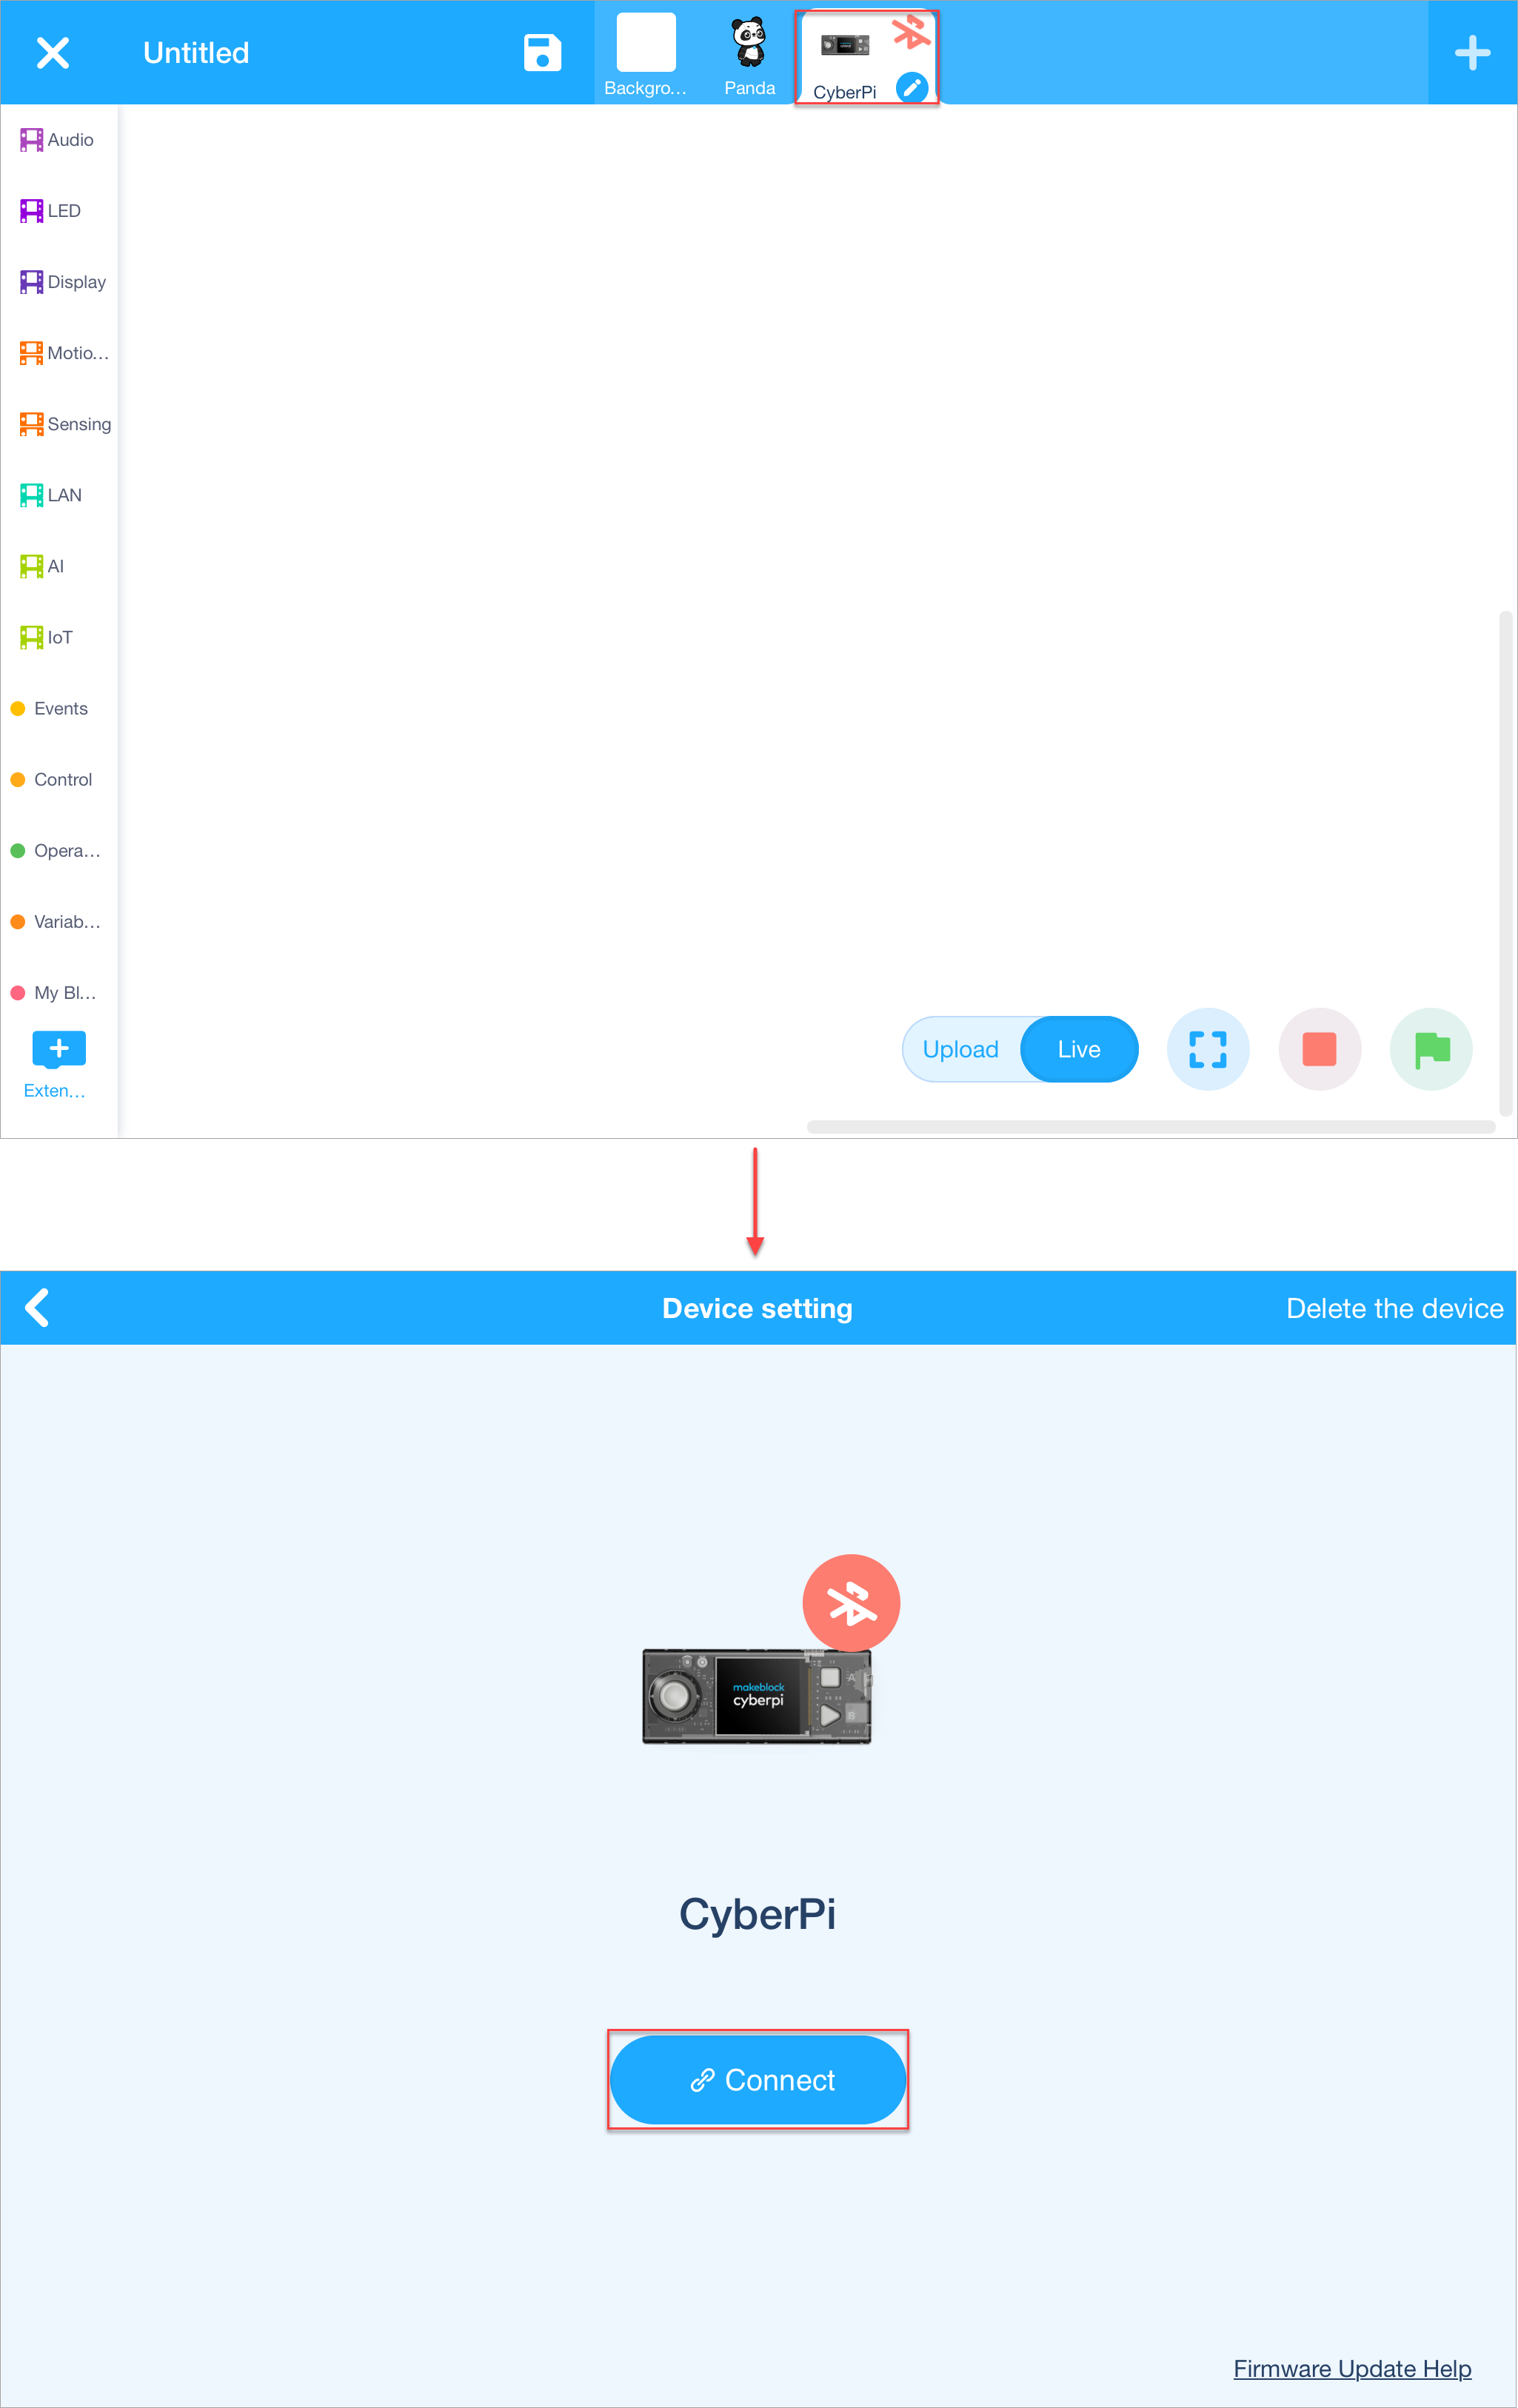
(7) Place your smart device close to mBot Neo.
mBlock automatically searches for and connects to mBot Neo.
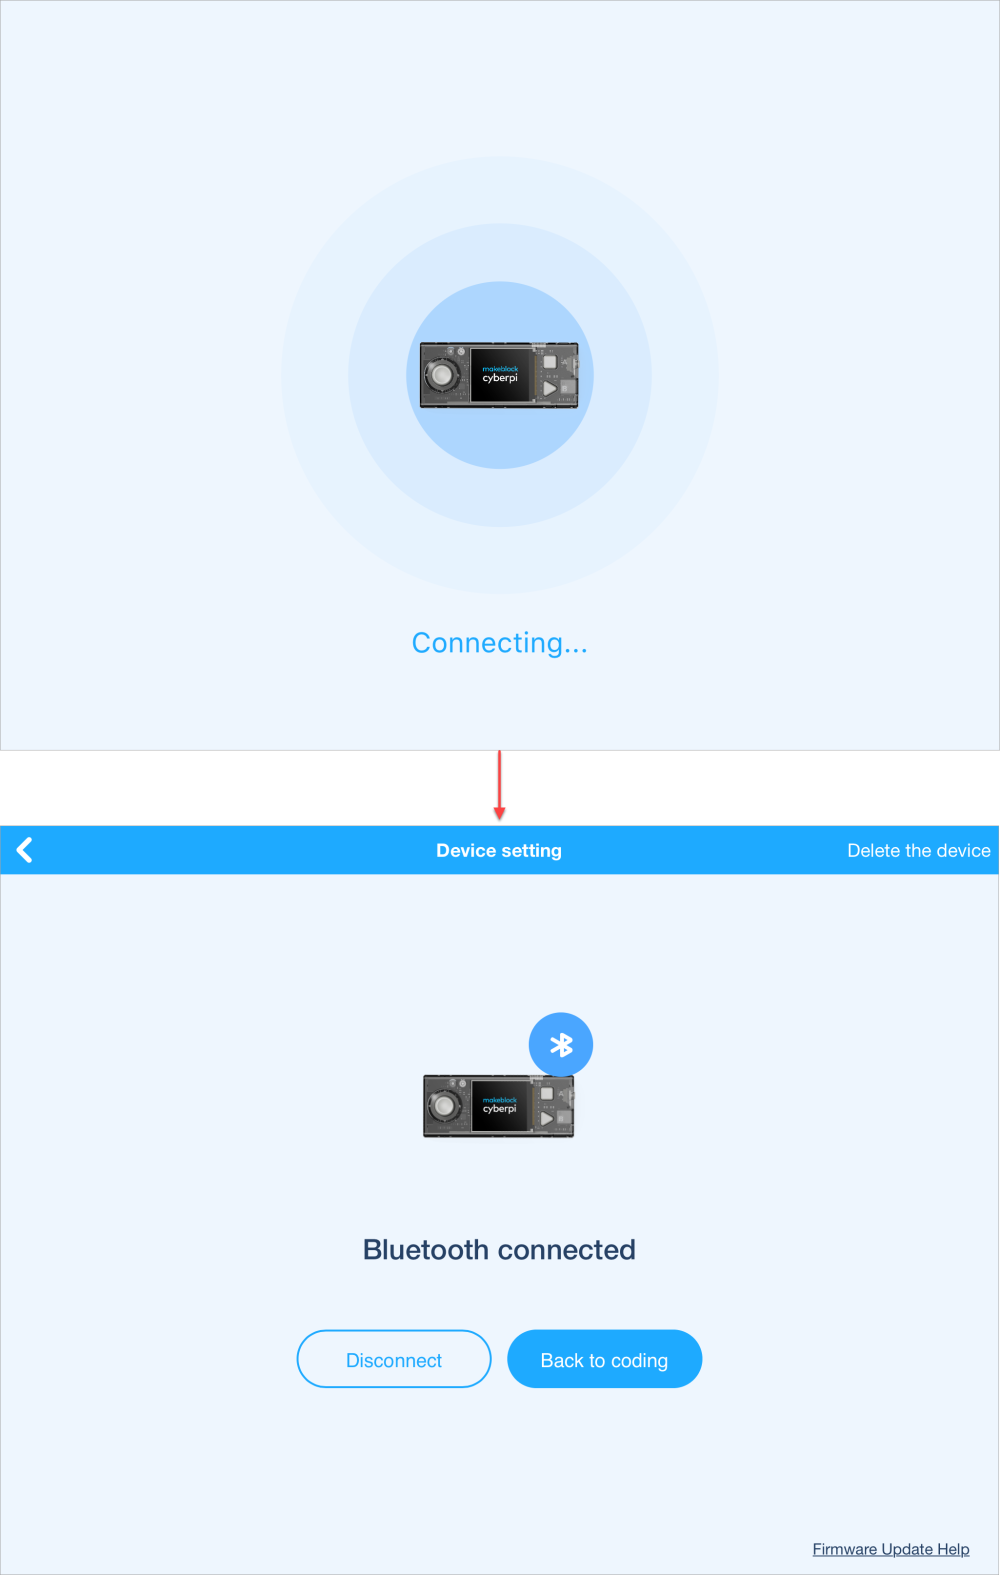
After the connection is complete, a voice message is played, indicating that the connection is successful.
3. Write a program
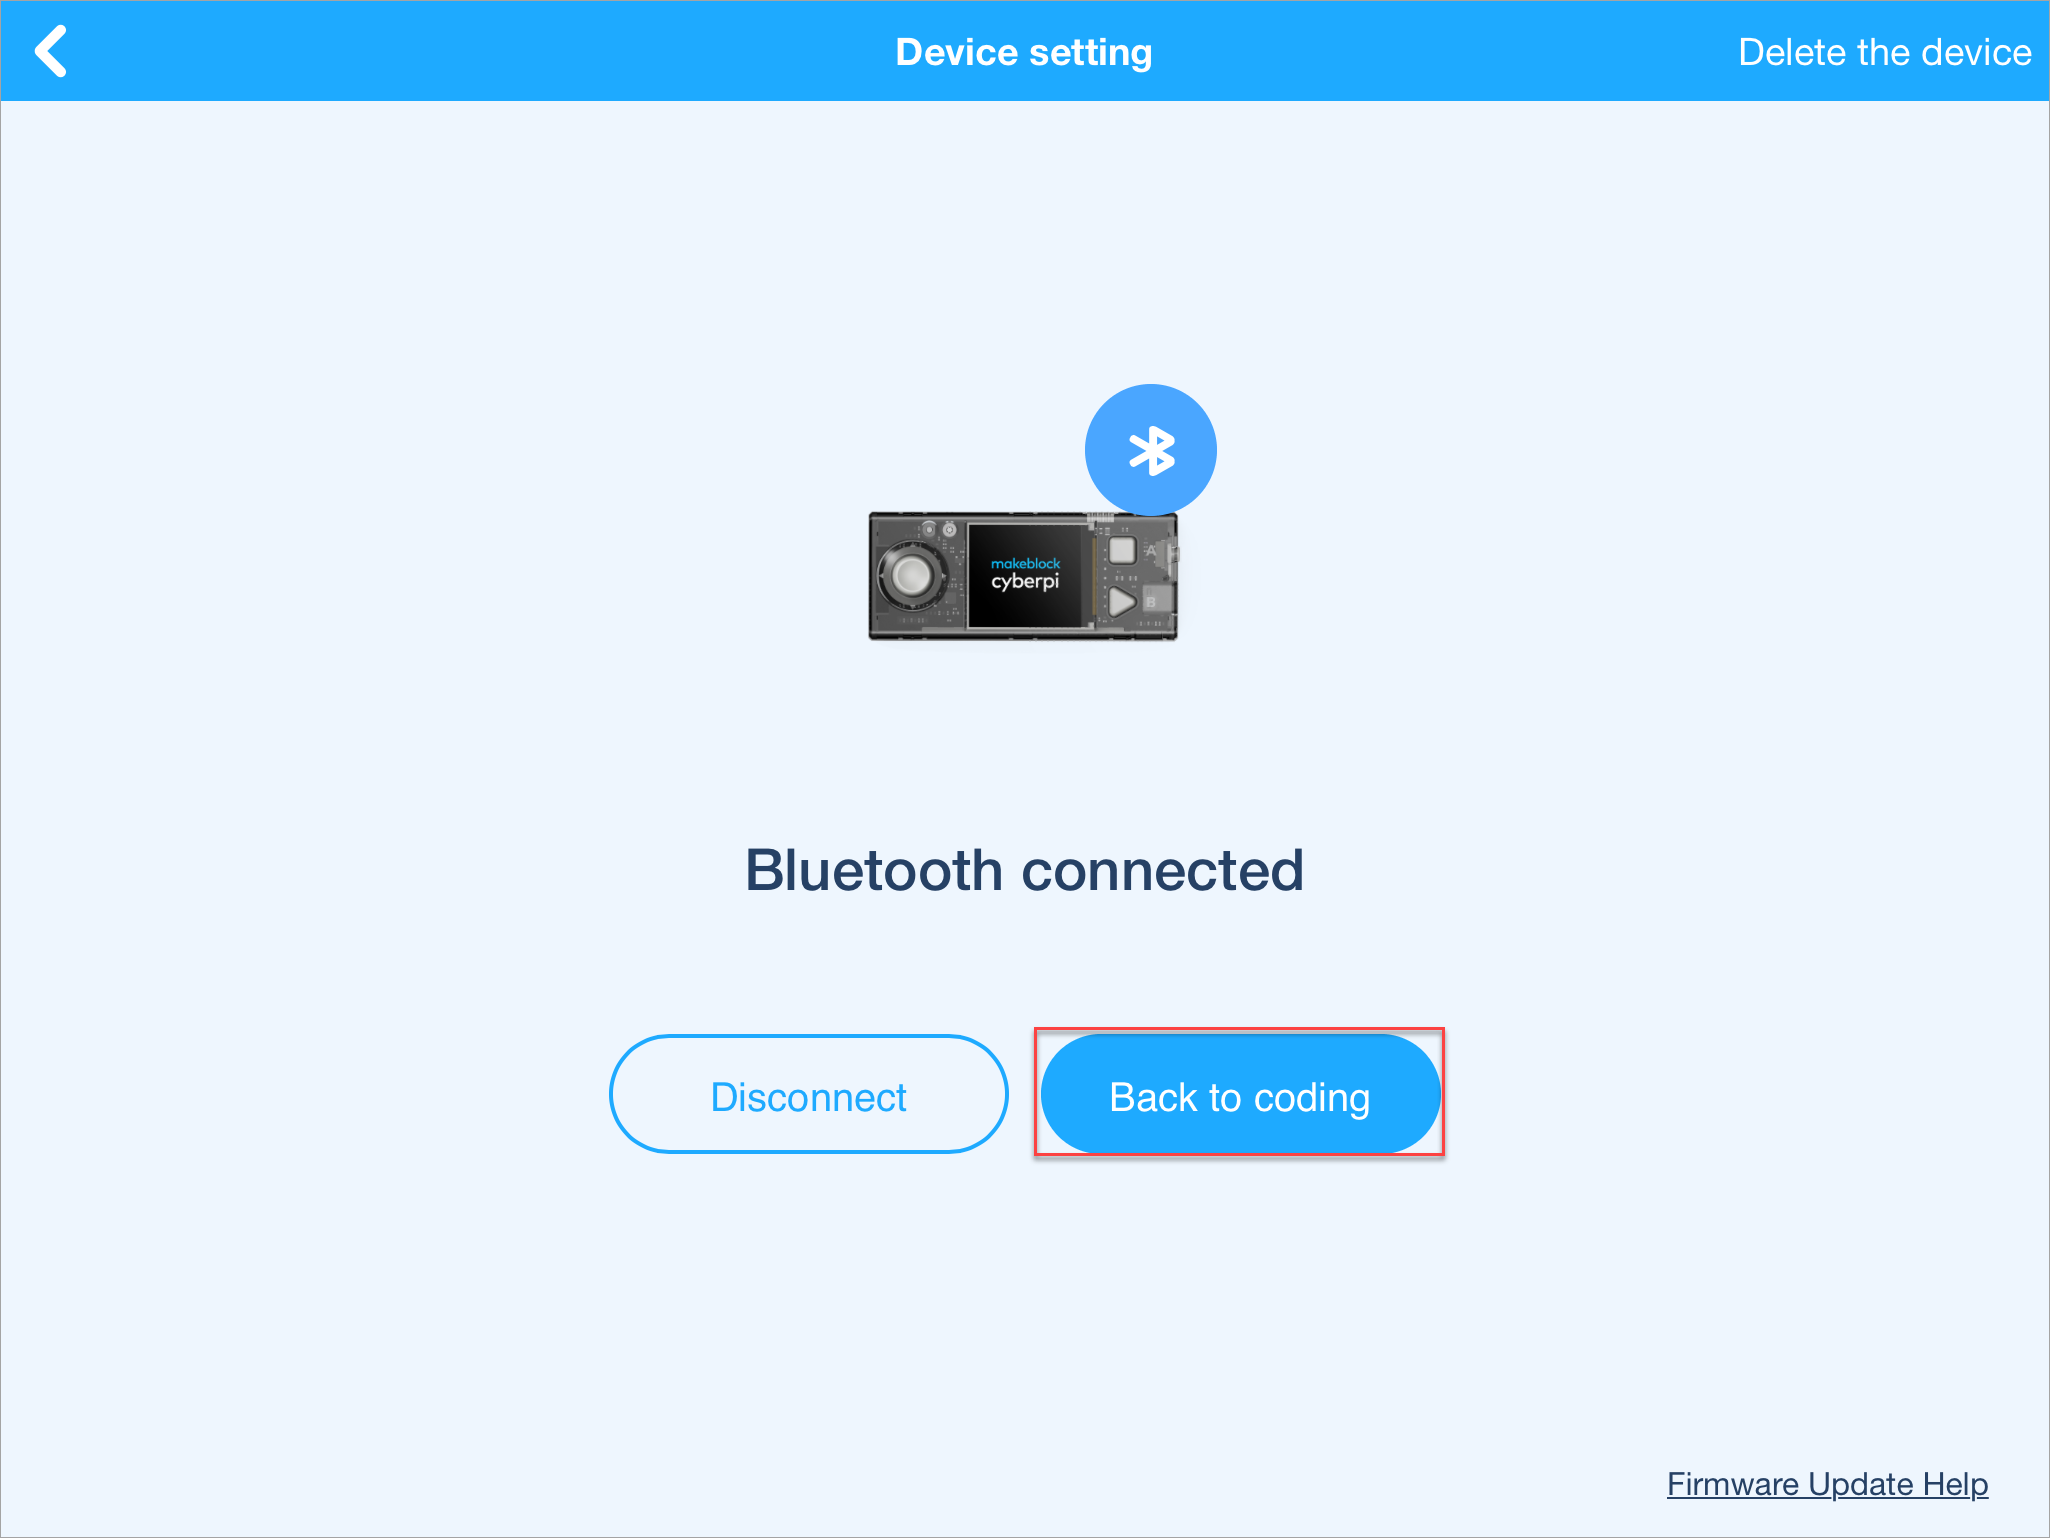
(1) Tap Back to coding.
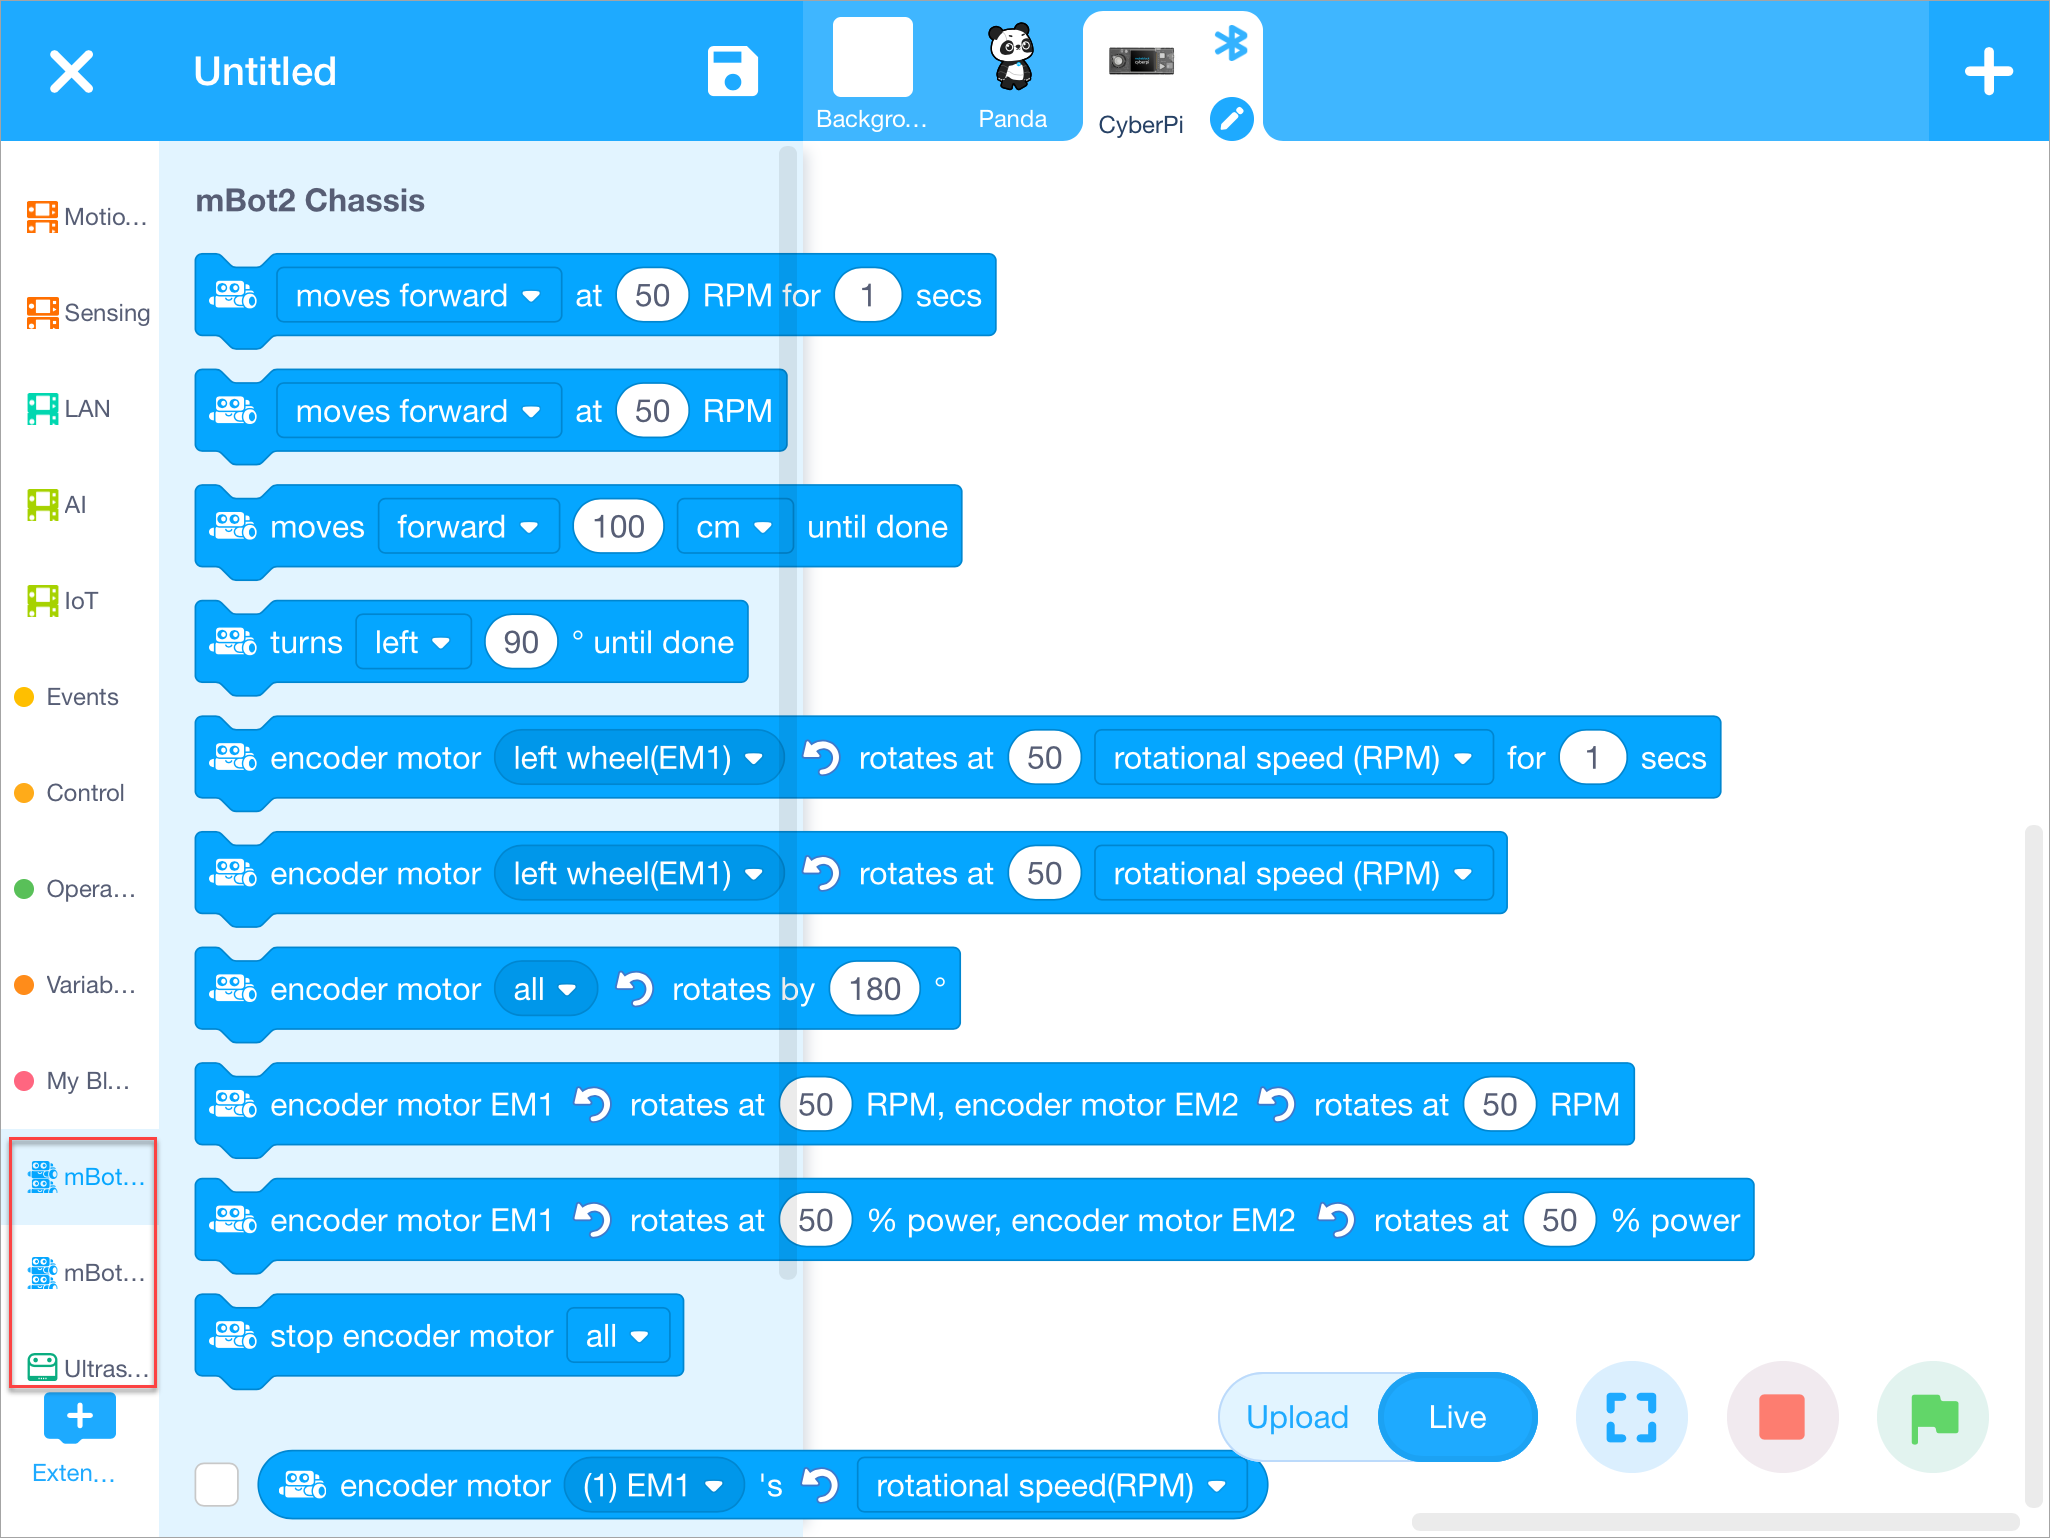
(2) Add the extensions required for the obstacle avoidance program.
To avoid obstacles, mBot Neo uses its ultrasonic sensor 2 to detect obstacles in its way and then respond to them by using the motors and wheels connected to mBot2 Shield. Therefore, you need to add the mBot2 shield and Ultrasonic Sensor 2 extensions.
Add them as follows:
a. Tap + Extension at the bottom of the blocks area, and then tap + Add under mBot2 shield on the Extension Center page that appears.
b. Tap + Extension at the bottom of the blocks area, and then tap + Add under Ultrasonic Sensor 2 on the Extension Center page that appears.
After the extensions are added, you can find the blocks in the blocks area.
(3) Set the programming mode to Upload.
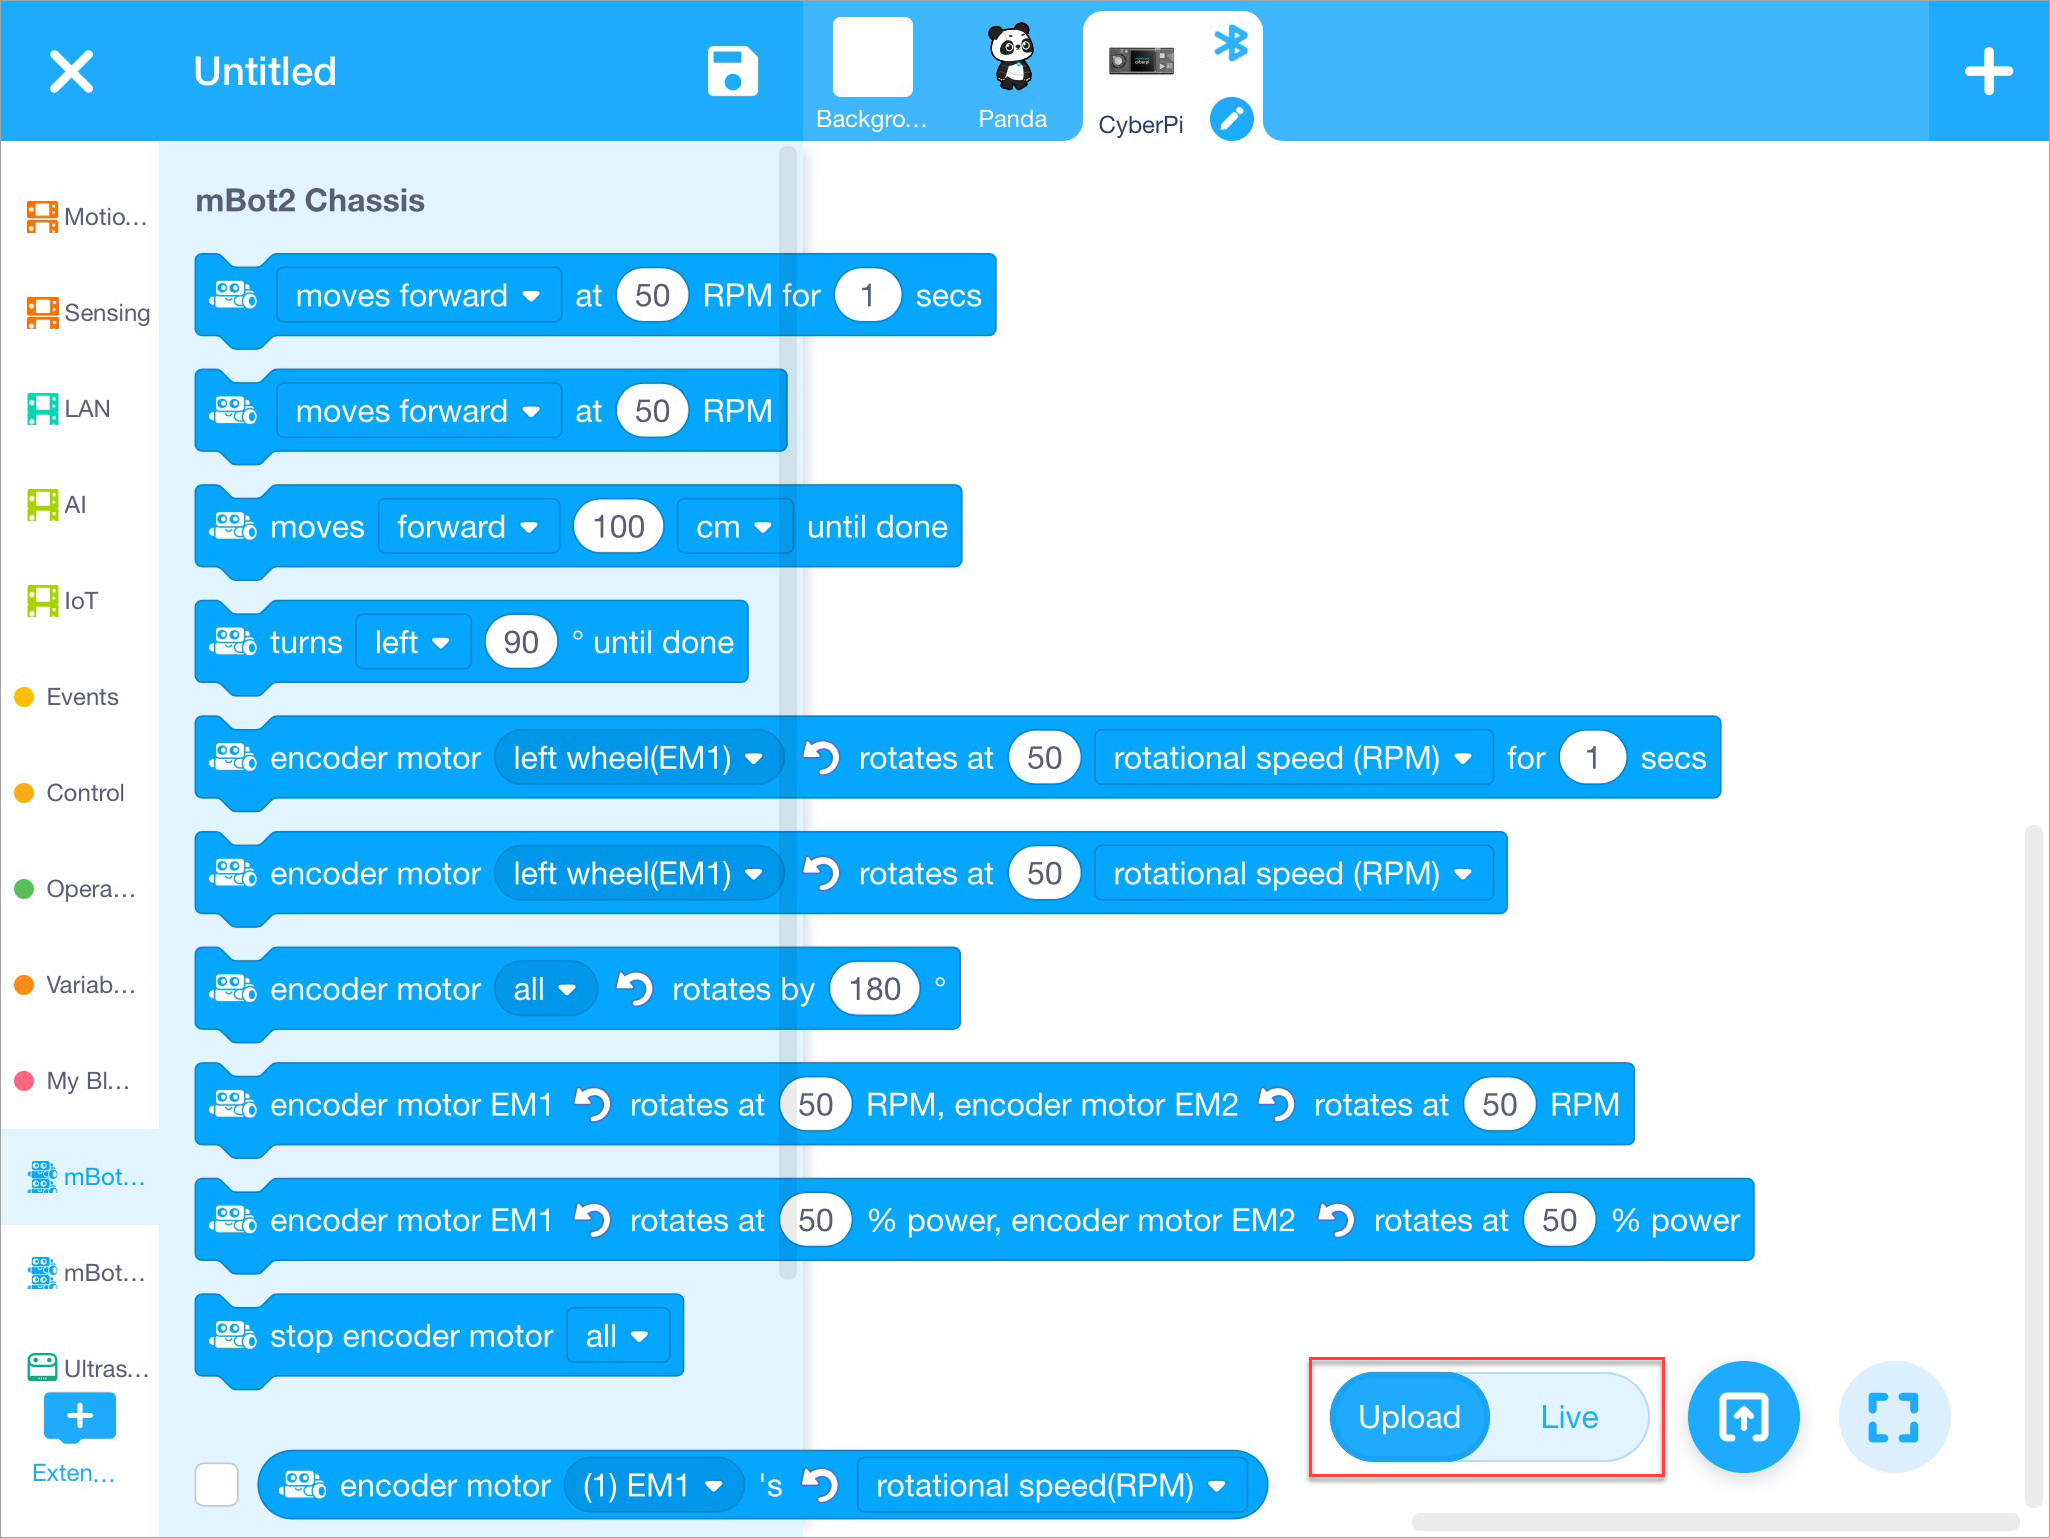
Live: In this mode, you can view the program running effect in real time, which facilitates the debugging of the program. In this mode, you must keep mBot Neo connected to mBlock. If they are disconnected, the program can't be run.
Upload: In this mode, you need to upload the compiled program to mBot Neo. After being successfully uploaded, the program can still run normally on mBot Neo when it is disconnected from mBlock.
(4) Drag blocks to the scripts area.
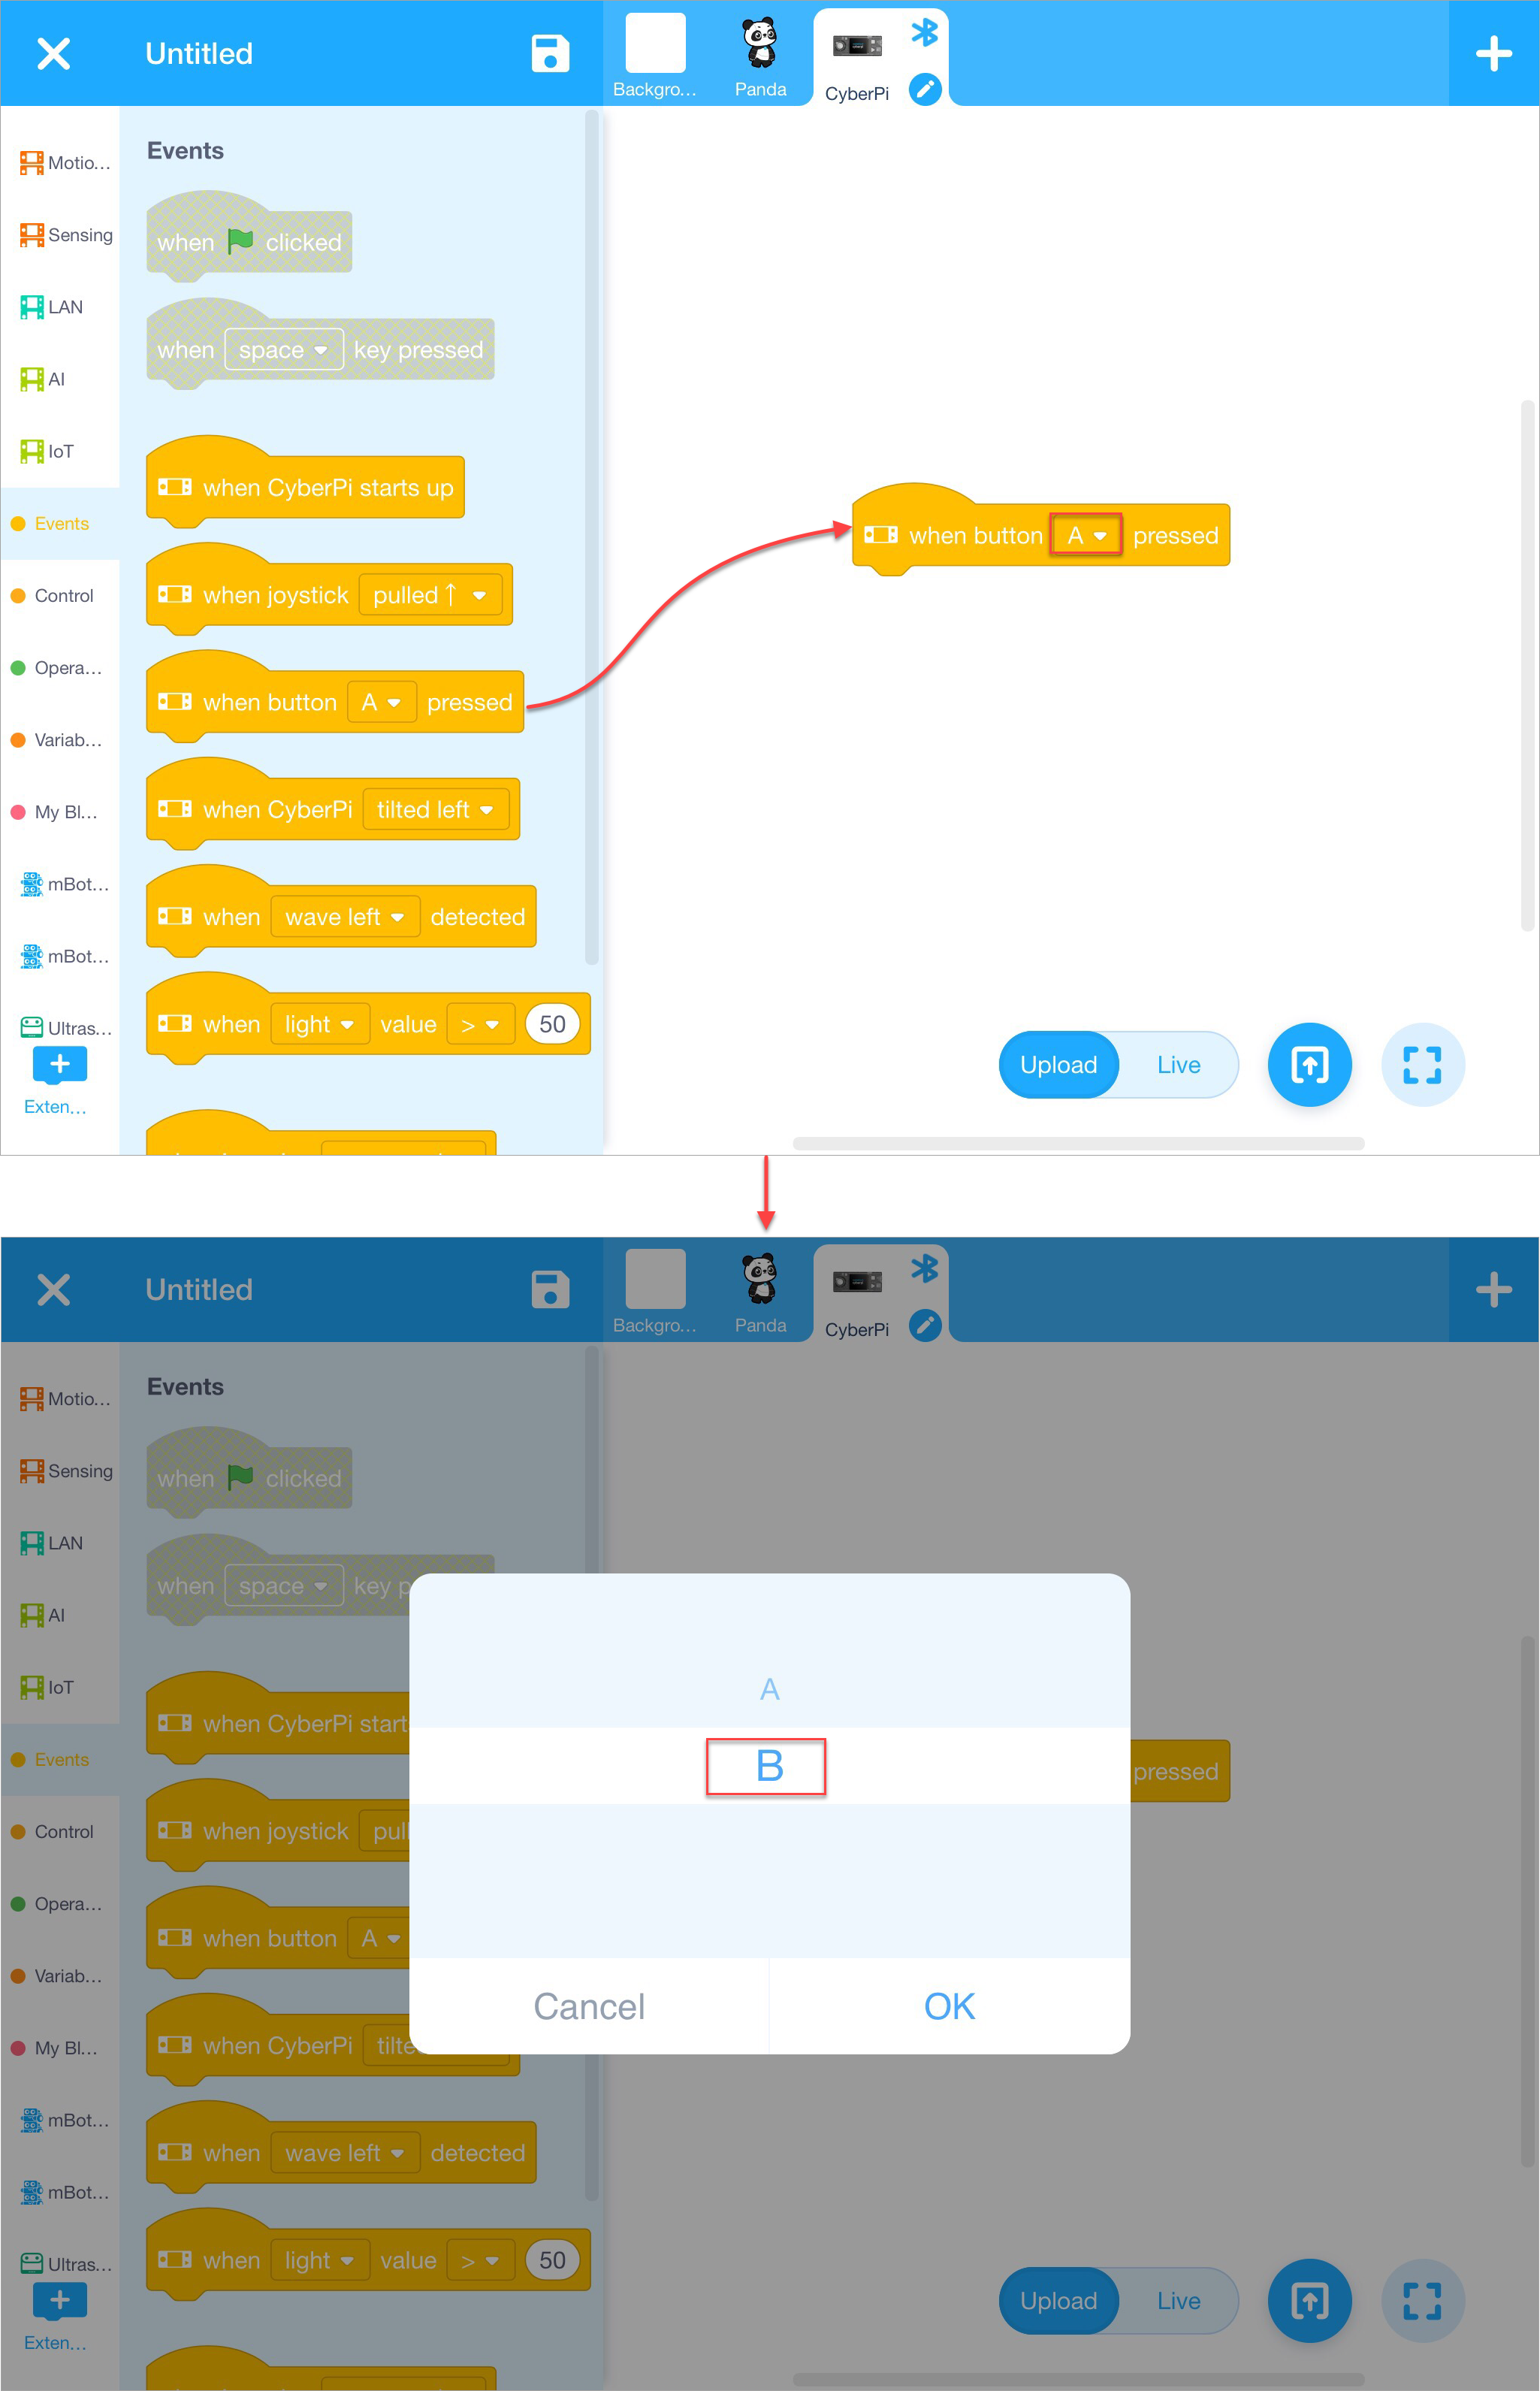
a. Define the time when the program is triggered by selecting an appropriate block from the Events category. For example, select the block when button () pressed.
Tap Events, drag the block when button () pressed to the scripts area, and tap the drop-down list box to select button B, so as to trigger the program by pressing button B.
b. Define the number of times the program is to be run. For example, keep the program running after it is triggered.
Tap Control and drag the block forever () to the scripts area.
c. Define the specific conditions for obstacle avoidance and how mBot Neo responds to an obstacle.
Define the condition
For example, mBot Neo starts to avoid an obstacle when it is 9 cm or less away from it, and mBot Neo keeps moving forward when no obstacle is found or an obstacle is more than 9 cm away from it.
Tap Control and drag the block if () then () else () to the scripts area.
Set the condition with a distance.
Tap Operators and drag the block () > () to the scripts area and put it in the condition block.
Tap the value 50 to change it to 9.
Tap Ultrasonic Sensor 2 and drag the block ultrasonic 2 () distance to an object (cm) to the scripts area and put it in the operation block.

Define the responses
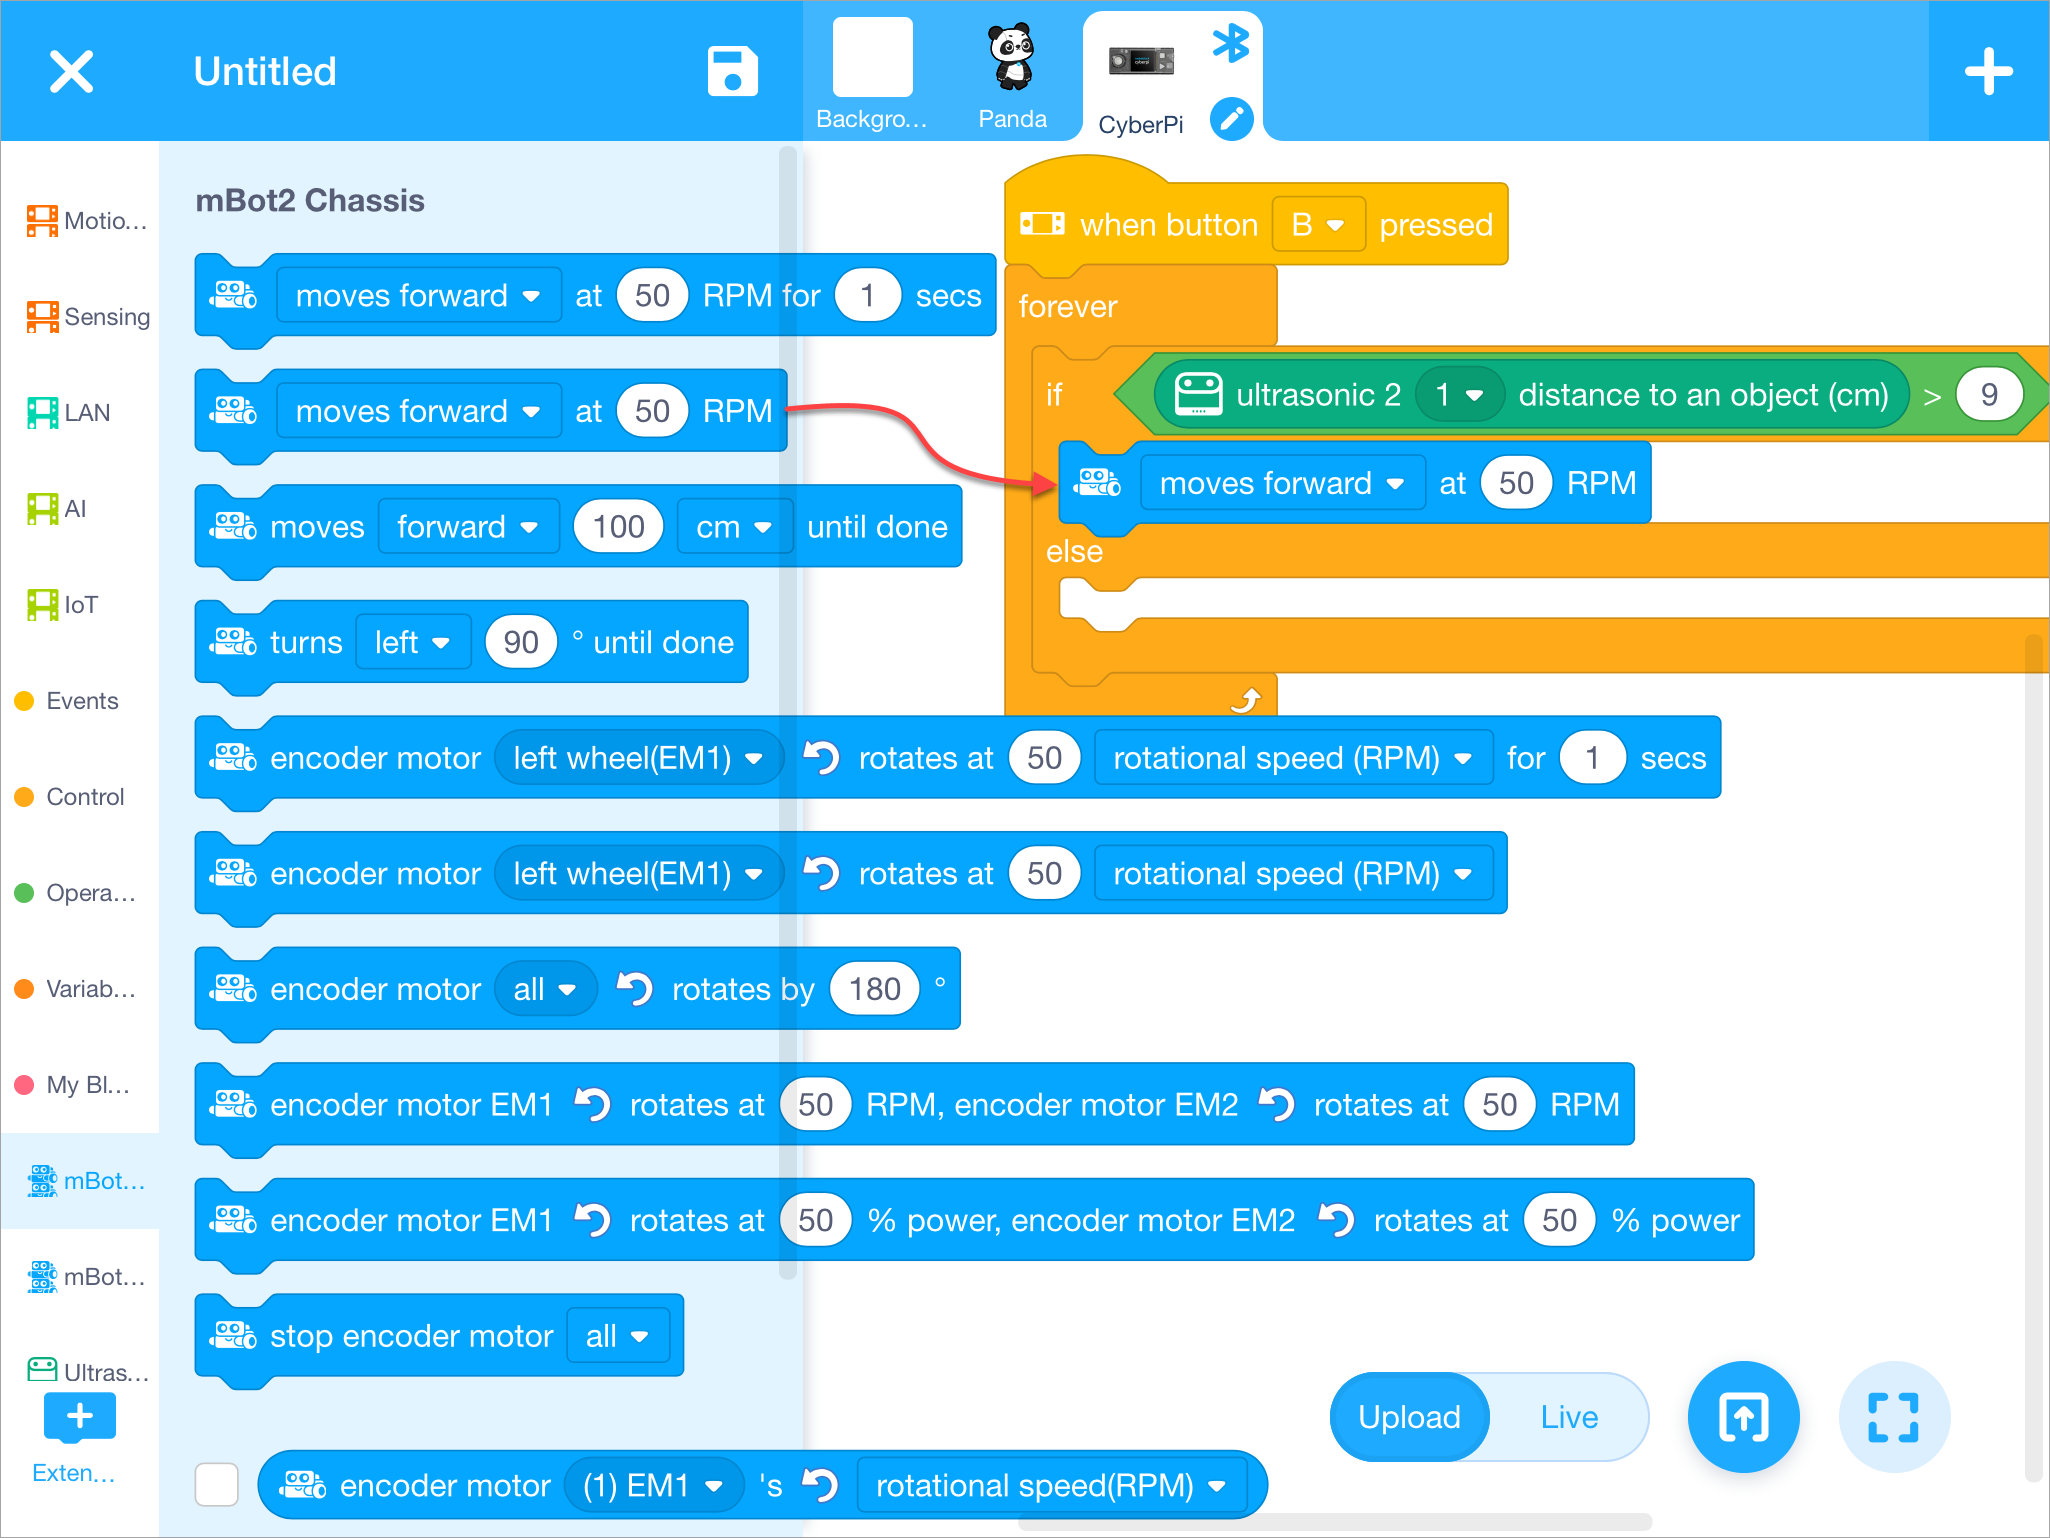
When an obstacle is more than 9 cm away from mBot Neo, mBot Neo keeps moving forward.
Tap mBot2 Chassis and drag the block () at () RPM to the scripts area and put it in the condition block.
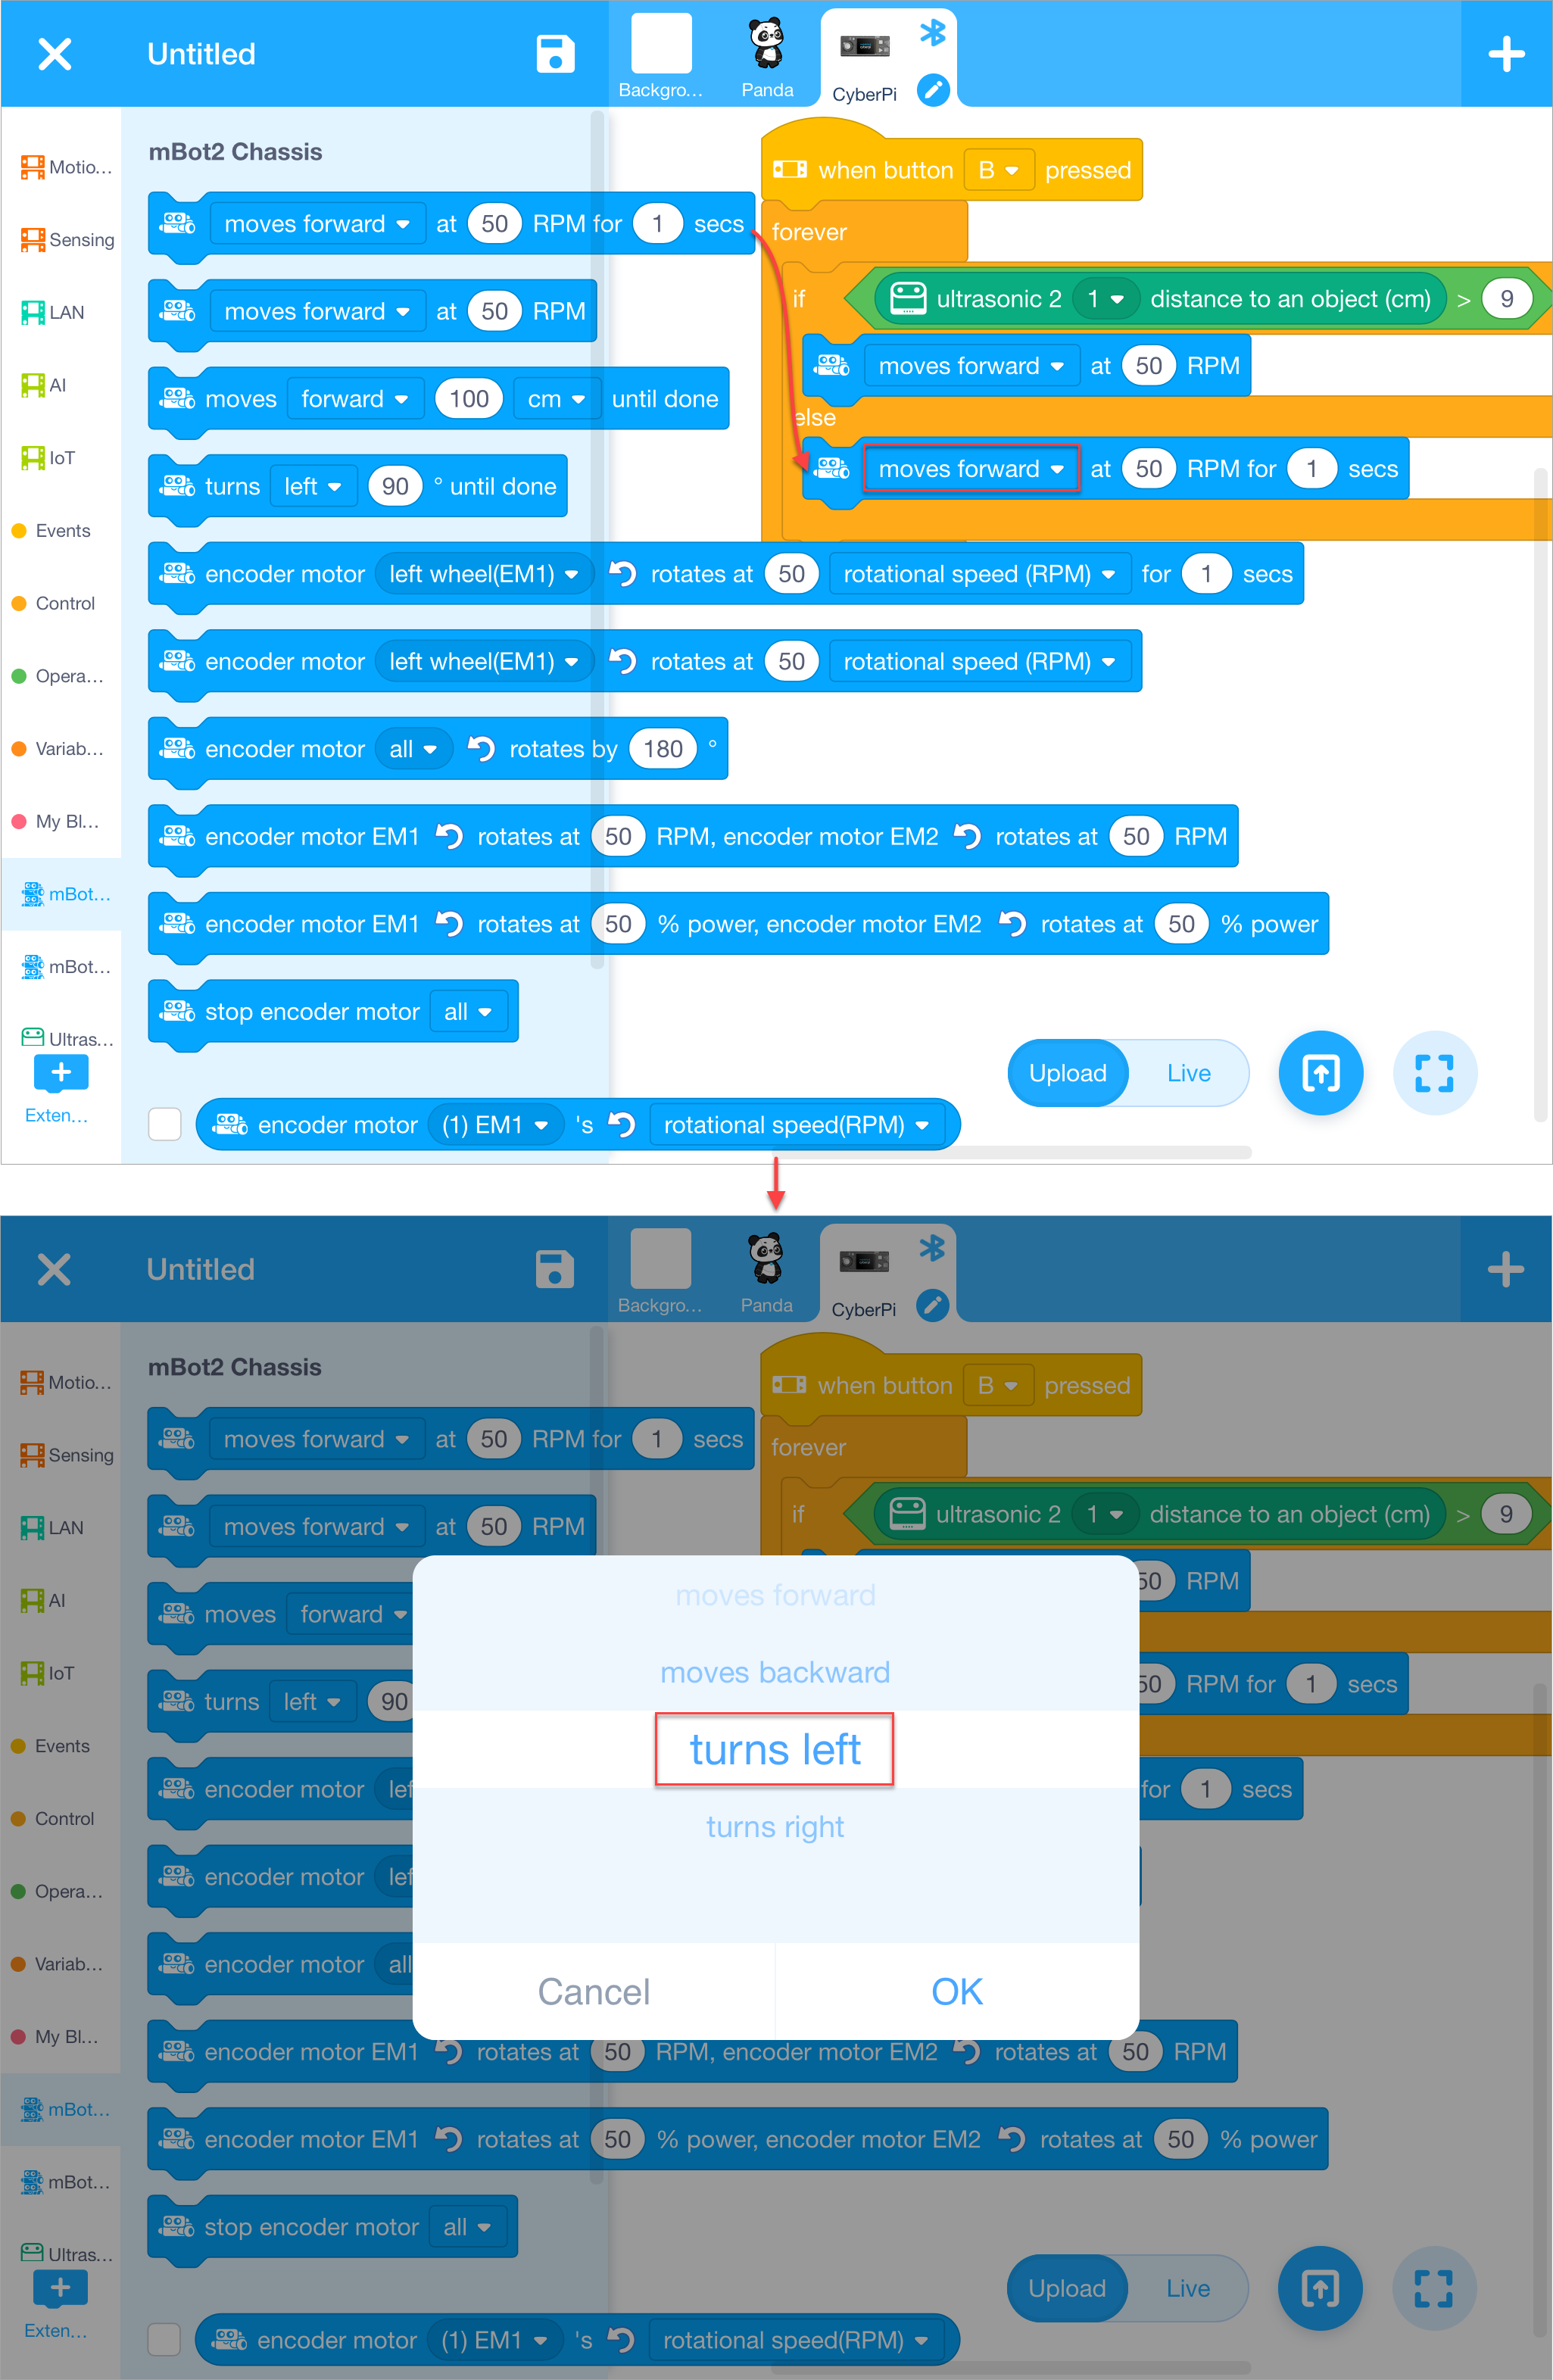
When an obstacle is 9 cm or less away from mBot Neo, mBot Neo turns left.
Drag the block () at () RPM for () secs to the scripts area, put it in the condition block, and tap the drop-down list box to select turns left.
Now, a simple obstacle avoidance program is completed.
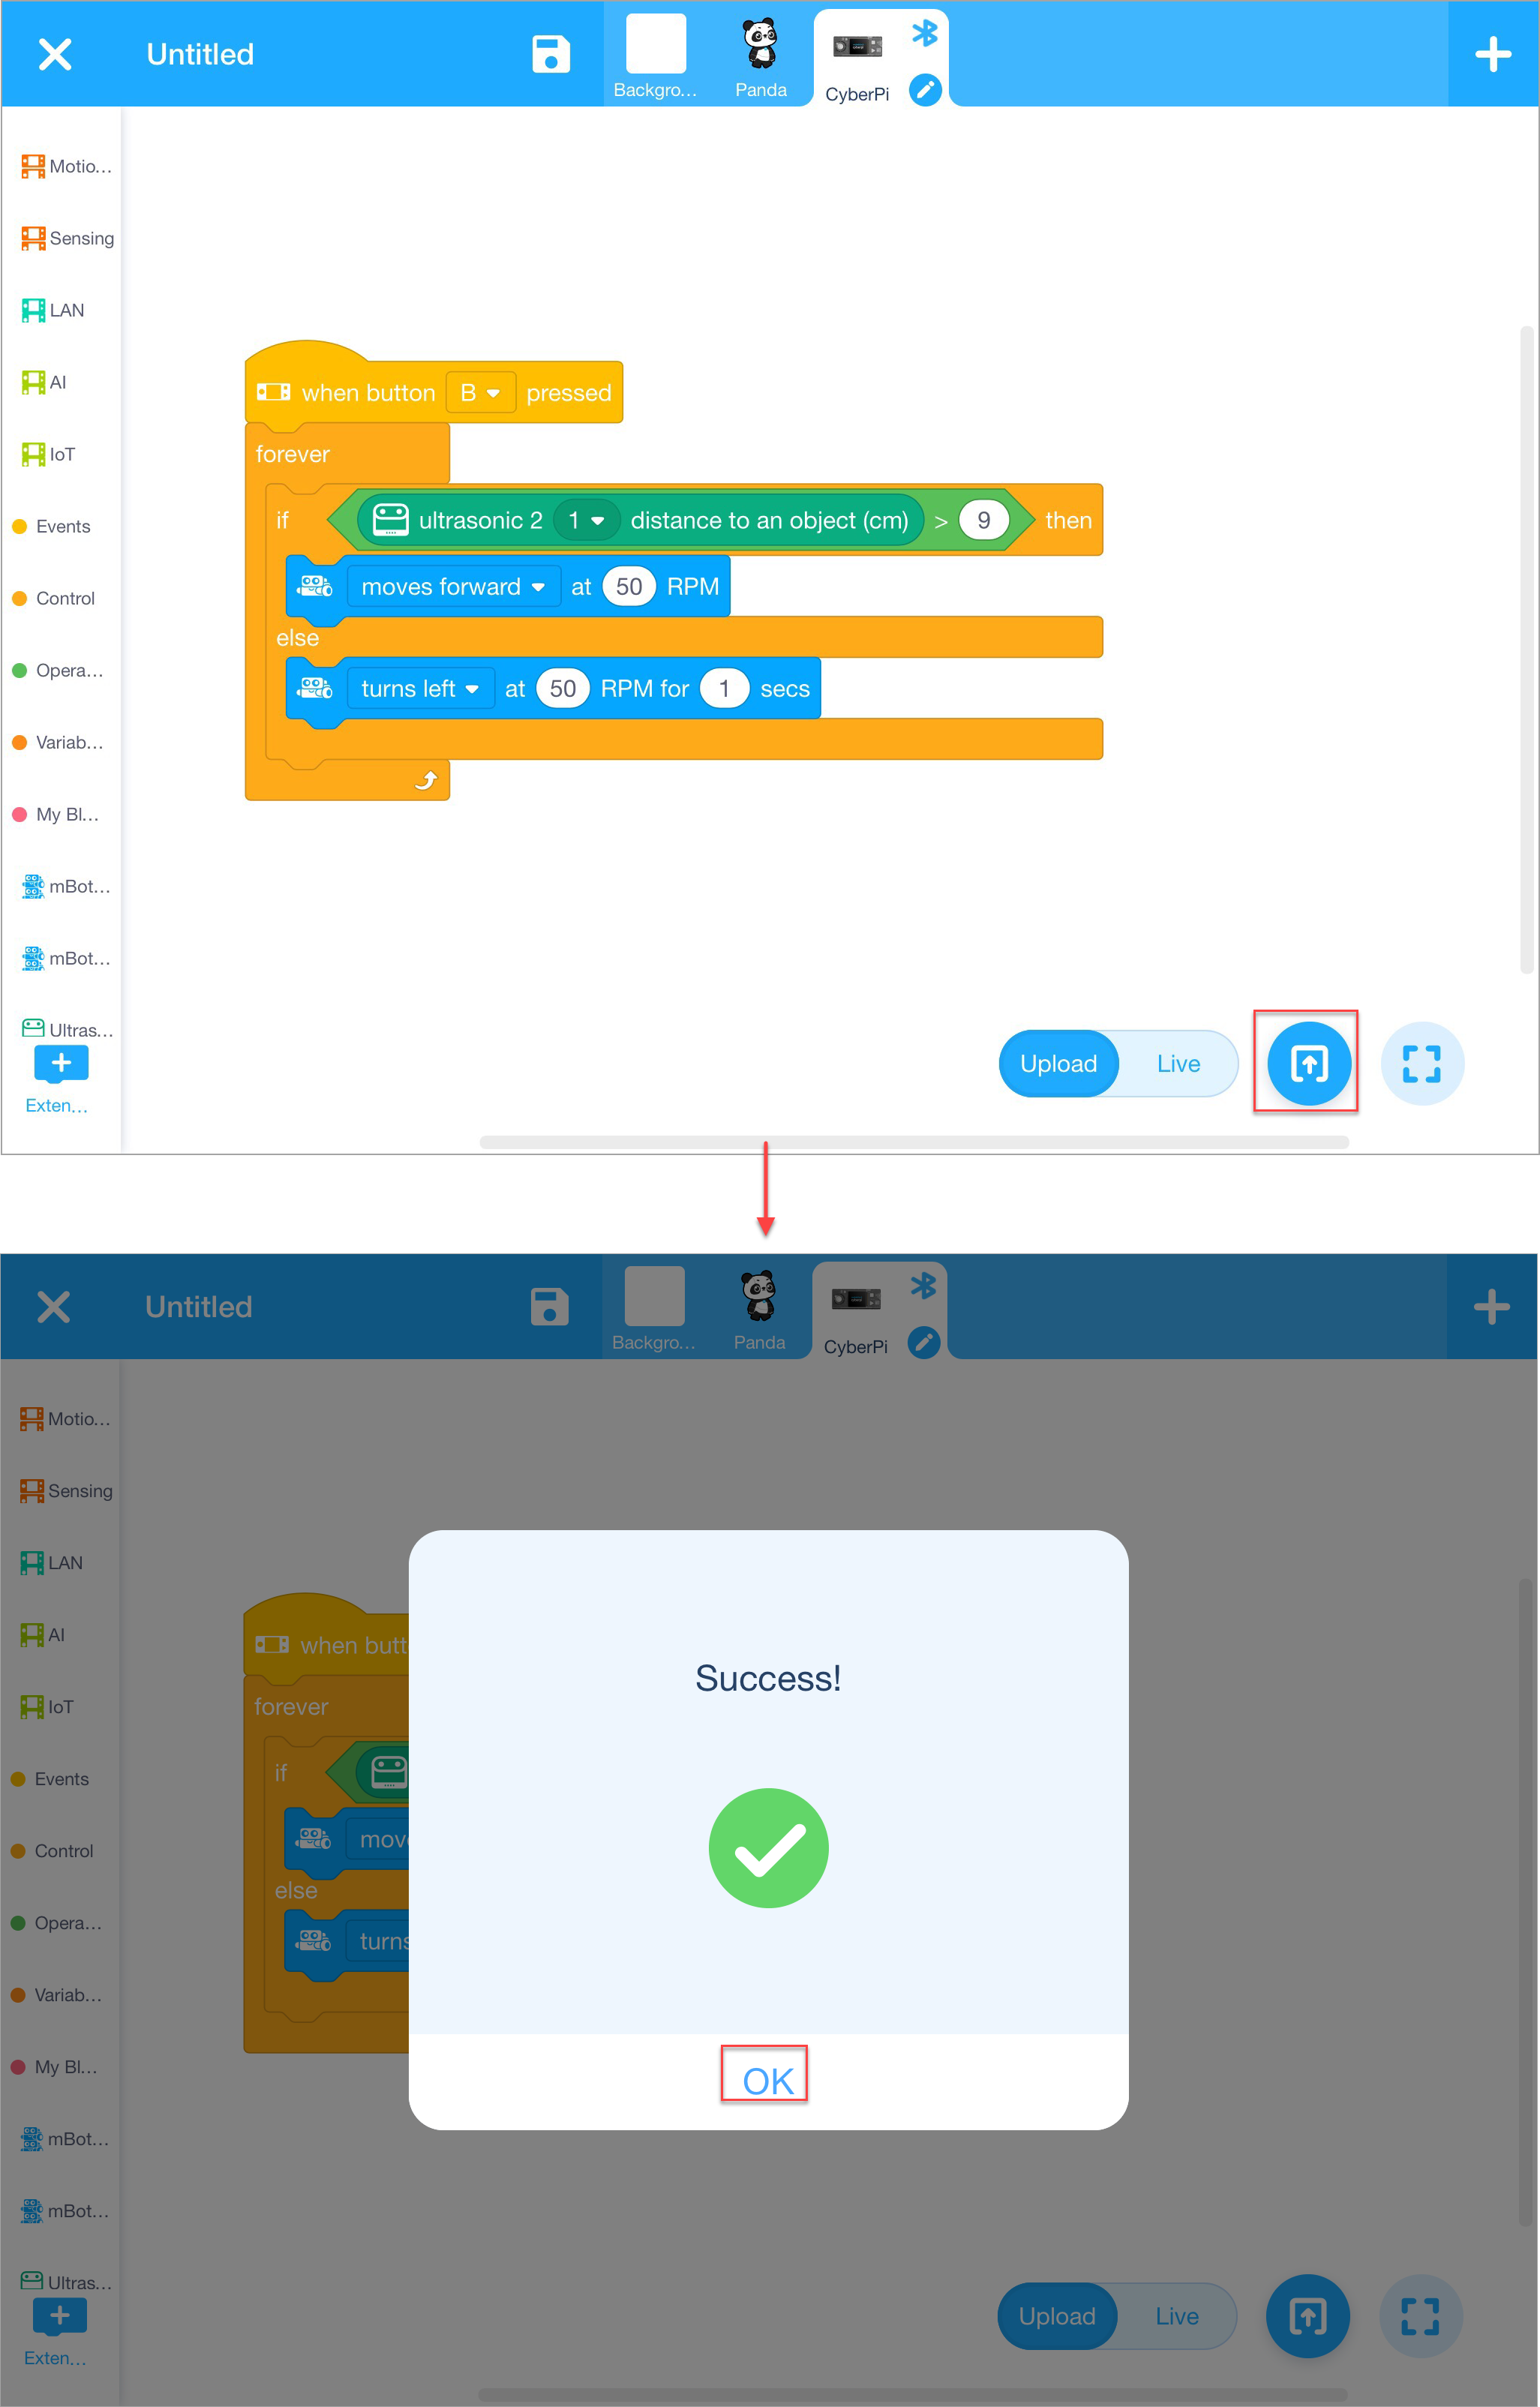
4. Upload the program to mBot Neo
Note: The program you upload will replace the last program you ran on mBot Neo.
Tap the Upload icon, wait till the uploading is complete, and tap OK.
5. Run the program
Press button B on CyberPi to run the program.
See if it is as expected that mBot Neo starts to move forward and detects obstacles. When an obstacle is detected within 9 cm away from mBot Neo, mBot Neo turns left for one second and then moves forward.
Tips:
- You can change the parameter values on the blocks (e.g., change the distance threshold and responses) or add more conditions to compile your own obstacle avoidance program.
- You can also compile other programs (such as a line following program) in a similar way.
Comments
Please sign in to leave a comment.